Buzzings from a quilter who bumbles her way through life!
Showing posts with label techniques. Show all posts

Thursday, September 5, 2013

Just How Hard is Freezer Paper Applique?

"There Was an Old Lady Who Swallowed a Fly"

Some of you have expressed concern that applique looks too complicated. I think you would be surprised at just how easy it can be. There are methods that are more complicated than others, but after trying them all when I first started, this is the method I settled on. I use a freezer paper method where the freezer paper is ironed to the RIGHT side of the fabric and the seam allowance is turned to the back using a glue stick.
There are several reasons I love this method:
  •  First, it is simple. This is something a beginner can do. Really!I've taught this as a class and the most common comment I hear is, "Oh, this is so much easier than the way I've been doing it! I can do this!"
    Large figures make for really easy applique!
  •  Second, what you see is what you get. Your edges are turned under and ready to sew before you even lay the pieces out on your background. That means you can see exactly what it will look like. You can change colors or fabrics at this point if you are not pleased with what you see, you haven't invested a lot of time in it yet.
  • Since your edges are turned under and ready, you can concentrate on your stitches.
  • Since the freezer paper is ironed to the FRONT of the fabric, you don't have to disturb your seams when you remove it.
  • You are not committed to hand applique. You can easily sew the pieces down by machine, but you have no raw edges. This means your applique will hold up to some real use.
    Tropical quilt with appliqued flowers for my granddaughter's room
  • You do not need to reverse your images when you trace them off. You trace it exactly as it will look when you finish.

    If you are interested in seeing a detailed tutorial of this method, go here. I also have some previous posts that you might find helpful for applique: (just click on the subject you are interested in)


 Finding the Right Background for Applique

Thursday, February 7, 2013

Herringbone Scrap Quilt Tutorial

 
 I have a LOT of scraps that I would like to use this year. I have been trying out different fast and easy methods of using them in my quilts. One very easy method is the "Herringbone" quilt. This is a very old and very easy method. Best of all, you can custom cut your strips to fit the size scraps you have. Both of the quilts above were made using this simple method.
First you need to cut your strips to the same width and length. The batik quilt above used a purchased set of batik strips similar to a "Jelly Roll". The strips were 2 1/2" wide x 42". I cut them into 10 1/2" lengths and left the width the same. The quilt on the right used scraps that I cut to 1 1/2" x 5". (A pleasing size seems to be the a width you choose and the length ABOUT 4 or 5 x that width. So a 3" width might have a length that is somewhere between 12" and 15".  This is not a hard and fast rule. Experiment with what you have!)
Here is the way to start:
 
 Sort your strips into colors. Pull from each stack as you go. You can either leave it very random as in the quilt on the right, or planned as the quilt on the left. 
Place two strips right sides together as shown above. Sew across the end as shown. The first set will be a short seam
Finger press the seam toward the point.  
 The next strip will go across the intersection of the previous two strips, as shown. Press the seam toward the point.
 The next strip goes across the new intersection and along the second strip you added.
 This is what you will have so far. The next strip will go along the orange/blue strip. Just remember that you will always be sewing across the end of the last strip and the length of the previous one.(Note the next strip will be sewn to the orange/blue side and not the all orange side in the photo.)
 Keep going like this. You will find that when you get going, it will be very fast and easy! Keep finger pressing the seams to the point.
Lay out your strips to see the arrangement you like. If you want an arrangement like the one above, you will have to sew some strips in reverse. (Where you started with blue and then added red, on the next strip start with red and add blue. It will make sense when you see it.) If you are making a random arrangement, you don't have to change anything.) Make the rows as long as you want. Instead of just holding them up to see if they are long enough, count the strips along the edge.
NOW PLEASE TAKE NOTE: You have edges now that are bias. Handle the strips gently and sew a "stay stitch" along the edge to stabilize it before sewing the strips together. Also, it is helpful to not cut the points off the edge until after you've sewn the row together.  I didn't do either of these things in the batik quilt and had some distortion because of it.
Another thing to take note of is to match up the seams along the edges of the rows you are sewing together so that the rows match up. 
   On the smaller quilt, I chose to sew a strip between the rows. (I also stay stitched before sewing to keep my bias edges from distorting!)
  You could alternatively choose to cut your strips into blocks.
 Start saving those strips you have left over from borders and sashing. You might even want to start cutting scraps into strips and stashing them together until you have enough for a quilt. 
Have fun! Until next time....
Bee Blessed!
 

Monday, December 31, 2012

My Quilting Secret and a Giveaway!


Welcome to the Quilting Secrets Blog Hop! I had no problem deciding what my favorite secret is when Mrs. Pickles asked. It's glue.... glue sticks, school glue, and fabric glue.
I use glue sticks.....
1) ...when turning raw edges under to prepare pieces for applique. See the tutorial here.

2....when turning under hems before sewing. See tutorial here. You can find a tutorial here.

These table napkins have the hems turned under twice using a glue stick. The hems are pressed and they are ready to sew.
3.... to keep applique pieces in place before sewing them down. This eliminates pins getting in the way of your thread.

4.... to baste the quilt sandwich in place. This is easiest for small quilts and wall hangings. It also comes in handy if you run out of spray basting before you get to the end of the quilt!

5. ... to keep batting in place on the back when doing trapunto or any item you want padded.
A piece of batting larger than the area that was to be quilted was glued to the back. After quilting, the batting was trimmed right up to the edge of the quilting.

6.... to hold fabric in place for reverse applique.  


7. ...to hold trim in place to keep it from creeping out of place when you sew. (In the case of the picture below, the trim needed to drop down just above the 1/4" seam line so that the very narrow lace would show and the glue stick held it in place beautifully!)

8. ...to hold the beginning and ending of a section in place while you sew. 

9. ...hold a button in place so that it can be hand or machine sewn.

10. ...hold patches (such as those for scouting or military) in place so that you can sew them more easily.
11....hold hook and loop tape (such as Velcro brand) in place before sewing. Hook and loop tape that comes with an adhesive back will gum up your sewing machine needle very badly!

12....to hold the curled edge of a knit down smoothly for hemming.

13. ... to hold a zipper in place for easy sewing. No pins to sew over or remove. Just use glue in place of pins.
14. ... to match up stripes or plaids before sewing. (Use glue stick to hold the seam together in place.)

15. ...to hold tags and labels in place before sewing.
Rick-rack and both hearts were all glued together and glued in place before sewing the label on.
16....to hold applique pieces in the correct position on clear vinyl so you can "audition" different background fabrics. The tutorial is here.
17....to turn the raw edges in on handles you are making for tote bags.


I use school glue.....
18. ...to make perfect binding! There is a wonderful youTube tutorial by Sharon Schamber for making perfect binding for show quality quilts. Her secret tool? Elmer's School Glue and an iron! See it here.   
19. ...when I need a resist to make a design when dying fabric. You can see a tutorial here.

 I use fabric glue....
 20. ...to permanently attach beads, silk flowers, or other trim to projects. (Tooth fairy pillow tutorial found here.)

  Glue sticks are basically the same whether you pay $5 or 50cents. The more expensive glue sticks are a wonderful slim size that makes them easier to apply and less messy. It might be worth the extra cost to you! Since I wash my projects when finished, I don't worry about "acid free". The glue washes out of the fabric, except in the case of fabric glue.
Thank you, Mrs. Pickles, for putting together this Blog Hop. What a great idea! Sharing our secrets!!!
Now for a giveaway! (Giveway is now closed.)
Today’s lovely prize was donated by Chelsey Kilzer from The Fat Quarter Shop. One very lucky commenter will win one $25 gift certificate to be used online at The Fat Quarter Shop! The winner will be announced tomorrow!(You must comment for a chance to win.)
The Fat Quarter Shop was started by Kimberly Jolly in 2003.An avid quilter, Kimberly began her shop as a side business while still working a corporate position; cutting, packing and shipping right out of her house during evenings and weekends. From the very beginning, she was committed to top-notch service for every single order and customer. As the Fat Quarter Shop's reputation grew, Kimberly decided to make it a full-time operation. Her husband, Kevin, joined her not long after, and with his help, lots of hard work, and a tireless commitment, the store began to grow. Over the past few years a few more people have joined the staff!
They say, "As a team, we continue to branch out with the best fabrics, exclusive kits, quilt clubs, BOMs, and more. And we will always be driven by the passion that Kimberly founded the store upon, which is always giving you the best products and service!"


             The Fat Quarter Shop

Tomorrow you will be visiting Barbara.
Linda @ Buzzing and Bumbling  January 1st - you are here!
Sue @ Quilt Times  January 5th
 Until then.... 


post signature  

Monday, December 3, 2012

Adding Words to Fabric, Part 2


I have some more ideas about ways to add words to your projects. If you are in the In Your Words Blog Hop (January 7 - 16) you may need some ideas, but even if not it is always good to have a variety of methods at your fingertips. You never know when you might need one!  
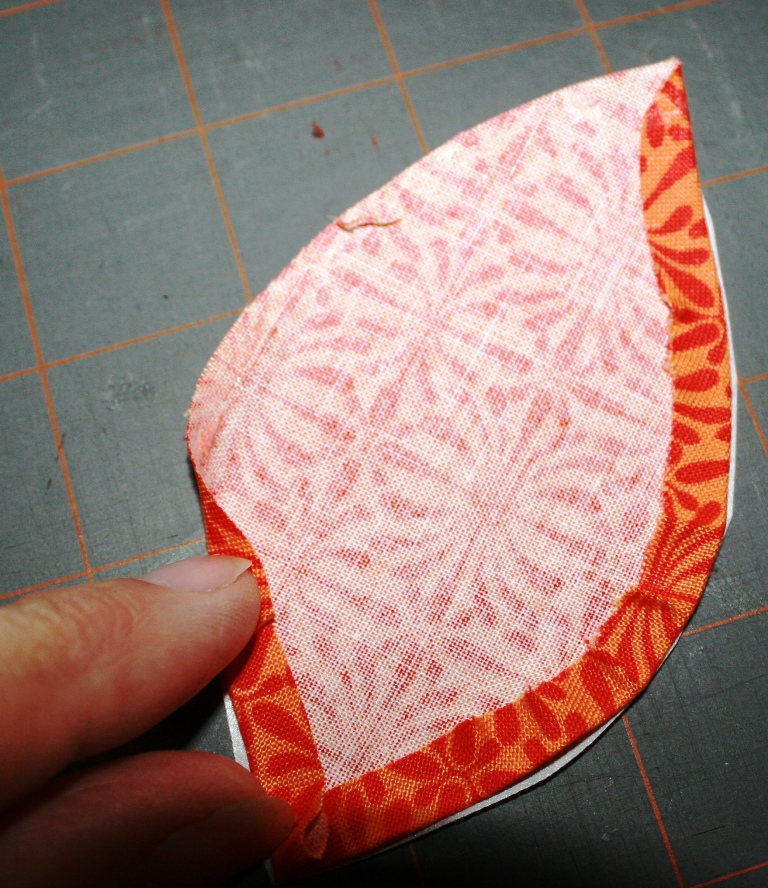
School Glue Resist
The sample you see at the top of the page was made with a school glue resist method. It is super simple and it might just be what you need. You can see the full tutorial here, but basically, you will draw out a design on muslin, outline it with school glue, and then when the glue is dry, you brush dye inside the lines and heat set the color. After all is finished, you wash out the school glue.  
 A variation of this method was used on the scrap above. I used rubber stamps dipped in school glue to stamp out a message and when dry, I dyed over it all, then washed out the glue. You can also just freehand your words with the glue bottle spout

  Text Fabric

This apron was made with an inset of fabric with a text printed on it. Sometimes you can fussy cut to get just the words you need. You could even piece them in to look "ransom note" style!
You can also use the words on a t-shirt for text. You must first back the stretchy fabric with an interfacing to stabilize it.
 
 Reverse Applique
 This letter is made of reverse applique - where an opening is made in the shape you want and a background is sewn behind it. In the case of letters, such as this D, you sometimes have to add the center of the letter in regular applique. 

   Shadow Quilting
An often overlooked method is shadow quilting. You cut out your letters from bright fabric and adhere them to your background either by glue or by cutting them from a fusible product.
 You place a thin white fabric over the letters. Test your fabric to be sure you can see through it enough. I have used Batiste here. Place batting behind the entire piece and machine quilt around the letters. You can then treat it as a single piece of fabric. The sample was made into a small pillow, seen above.

    Alphabet Beads

 I did a tutorial on tooth fairy pillows a while back and one of the pillows had this string of beads across the front. You can find alphabet beads in different sizes, colors, and shapes. They can be strung or sewn on to spell out whatever you wish! 
  Those same tooth fairy pillows had another idea that you can use to add words to your project: 

   Using Your Ink Jet Printer 


You can use your ink jet printer to print on fabric or onto t-shirt transfers that can be either sewn or ironed onto your fabric. Be sure you read the directions on the package if you buy the printer ready fabric or the transfer medium. This is easy to do and looks great, but is not as durable for something that will be washed a lot. You can also iron regular fabric to freezer paper that is cut to 8 1/2" x 11" and send it through your printer to print on. Be sure you have the freezer paper well adhered to the fabric and that you send it through so that the printing will come out on the fabric. 

 Machine Embroidery
If you have a machine that does this, you don't need instructions from me. Each machine is different. But don't forget that it can be used to add text to any fabric project! 

   Paper Pieced Letters  
I don't have samples to show you, but if you do paper piecing, you probably have books on the subject. Don't forget about this method! 

 Non-traditional Methods
I just want to mention a few methods that you might consider
Text can be added with a permanent marker and can be in your own handwriting. You can find markers in all colors now! Be sure it is permanent.
You can use acrylic paint to write your text.
You can sew magazine words to fabric if it will be a wall hanging or something that will not get handled or washed.  Quilt artists do this all the time.

Okay, have I given you something to think about? I hope so! Step out of the box and do something different! Be daring! 
There are still just a few spots left in the In Your Words Blog Hop, so you can still sign up. Send me an email here soon if you want in. (You can find a link to the guidelines on my sidebar if you want to see the rules first.)
 
Until next time....
                                                post signature
              
Related Posts Plugin for WordPress, Blogger...