Buzzings from a quilter who bumbles her way through life!
Showing posts with label fat quarters. Show all posts

Sunday, March 3, 2013

Snack Tray or Basket Tutorial

These little snack trays are simple to make, fast to make, and best of all, they save on paper plates for snacks and sandwiches. You can coordinate your trays to your tablecloth or picnic spread, or use them for popcorn for movie night at home. (One has an iron-on laminate, so it can be wiped out and reused easily!)


You don't need a pattern and you can make these as small or large as you want. You control the depth of the sides, so you can have a tray or a basket. (Easter basket anyone?) Large scraps or fat quarters are perfect for these!


 I've filled the basket with 6 little mini-trays - just right for a serving of chips, popcorn, apple slices, baby carrots, .....use your imagination! Even cookies will work in these! Of course, they don't have to be for food. You can use these little trays to hold jewelry, mail, make-up, sewing notions, socks in a drawer, fat quarters, Legos, dry cereal snacks for toddlers, etc. etc.
 Here's how they're made:
 First decide on a size. If you want a tray that is 7" x 9" with 1 1/2" sides, you will cut your fabric and batting 10" x 12" (7 + 1.5 + 1.5 = 10), (9 + 1.5 + 1.5 =12) You will need a fabric for the inside, one for the outside, and a batting for the inside to give it body. (Yes, you could use interfacing, but most of us have scraps of batting around and it works well.) NOTE: If you want a laminate inside, you can buy an iron-on type that is very easy to use. You just press it on, using the paper it comes on, and treat it as a piece of fabric. Be sure and follow the directions on the brand that you buy!
 Layer the batting between the inside and outside fabrics, right sides showing! Using a glue stick or a little spray basting will help it all stay together while you work. Even spray starching will help
Different set here, but you can see on this piece that you will then mark 1 1/2" (or whatever depth you want for your sides) around the sides and sew along the mark. I use a Frixion pen that disappears when I iron the piece. I also zig-zag along the edge. 
Use your ruler to make a mark that is a continuation of the stitch line you made. Do this at both ends. (It doesn't matter which two sides you choose.) This will give you a guide for the next step. At this point, you may want to make some simple quilting lines in the area that will be the bottom of your tray. I made an X on the small ones, and parallel lines on the larger ones.
 Fold on the diagonal at each corner and sew across the line you have just made. You will be stitching from the corner of the stitches in the middle to the edge.
 You will have a box now with sides that poke out!
 Fold the sides in as shown (I chose to fold them in on the shorter sides, but that is up to you.) Sew across the top to hold them in place. If you have laminate on the inside be careful to not touch the laminate with an iron, but press these in place. (You can sew the flap down along the diagonal fold if you wish. It is a little hard to do on the small ones with laminate, but easy on the larger ones.)
Cut a strip to use for binding. 2 1/4" wide will work unless you've made your tray really thick! Fold it in half lengthwise and press.
 Before sewing it on, turn one end under 1/4" so that the raw edge is hidden. Leaving the first 1 1/2" free, sew it on as you would a quilt binding - raw edge to raw edge, sew 1/4" from the raw edge, and when you come to the end.....
 ...slip the end inside the end that is turned under. Sew the remainder on. You will be stitching this closed by hand.

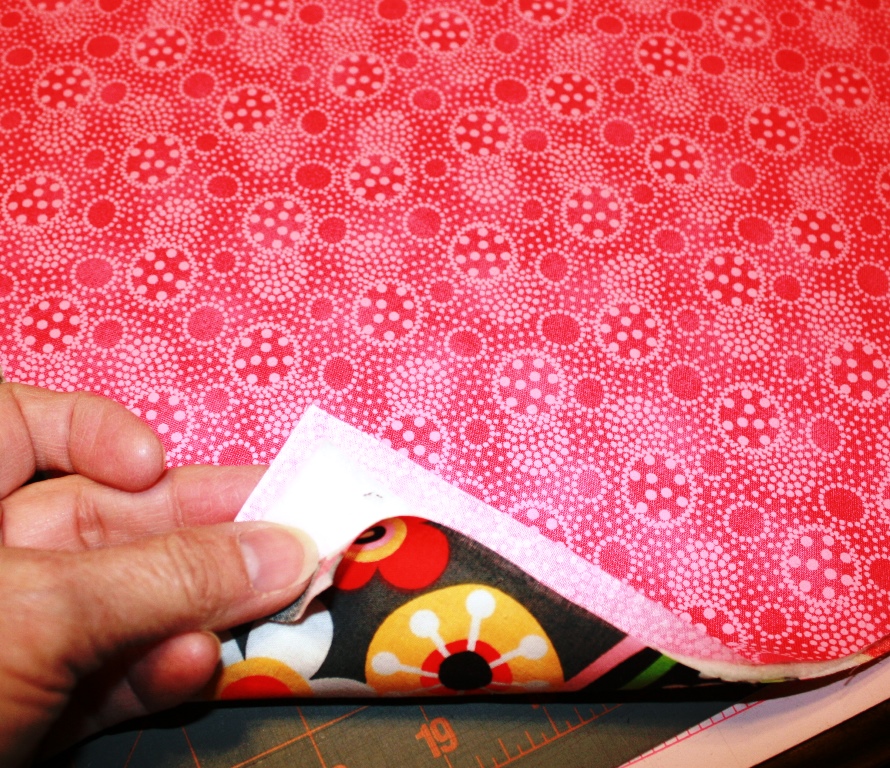
 Press the binding open. Remember to use the paper over any piece with laminate!!! Turn the binding to the other side to just cover the stitching and sew down either by hand....

                                         or machine.

Here is a basket (deep sides) and here are the trays (shallower sides).....


If you want sharper corner edges, just topstitch them! You can add a handle, or handles, to make a basket  Simply cut a strip about 3" wide, put a 1" wide strip of batting in the center, turn one edge in about 1/4", overlap the edges with the turned under edge on top, and topstitch. A glue stitck makes all of this much easier!
                                      Give it a try!
Until next time......
                             

Tuesday, July 19, 2011

Koozie Cutie Tutorial


 I have no idea where the word "koozie" came from, but you've all seen them and probably own some! 
This tutorial is for one you make yourself. It's a cute little quickly sewn project that dresses up that bottled water or soda can and makes it cute enough for a picnic! 


If you're suffering from the heat where you live, like a lot of the country, you know that the minute you take a cold bottle out in the hot air, you have condensation. This will soak up the extra water droplets for you and give it a little insulation.

Although I give you measurements for the one I made, you may want to measure your bottle or soda can to be sure it will fit. Just leave 1/2" extra length so you can sew 1/4" seams.
1. You will need an outer fabric, batting, and lining fabric. Cut pieces that are 4" x 9" and 2" x 3" out of each. This will be your "top" and "bottom" pieces.
2. Place lining and outer fabric right sides together with the batting on the bottom. Do this for both sets - both top and bottom.
3. For the bottom set, sew around three sides, leaving one shorter side open.
4. Turn this piece right side out.
5. Pin between the lining and outer fabric in the center along the bottom. Pin the open end to the bottom of the seam. You will catch this in the bottom seam. Sew both long sides together using a 1/4" seam. (Leave the ends open.) Turn right side out.
6. Fold in half with outer fabric inside. Sew along the open edge using a 1/4" seam.
7. Whip stitch the loose end of the bottom to the opposite side of the top. Turn right side out.
8. At this point, it is finished.......BUT, it is so much fun to embellish it!!! I sewed a little silk flower on mine. How about buttons, rick rack, embroider a name...whatever you can dream up. Make it fit the theme you want to carry out.
Use your imagination! Can you see novelty fabrics for a birthday party? How about a fabric that coordinates with your dishes? Or maybe each person can have a different fabric to help you keep everyone's bottles or cans straight.  A bottle of water with a nicely decorated koozie can become a small gift for a hospital patient or their family members. 

 
                 As always, have fun with it!


post signature


Monday, June 27, 2011

Lunch Bag or Purse Tutorial and a Giveaway!


 I was looking through a sewing book from the 1940's that had a description of what they called a "Miser's Bag". It was basically a bag formed by a tube with a circular bottom and a drawstring at the top. I thought it would make a great lunch bag, so I used the basic idea and added my own touches to give it a little more appeal! 


To start with, you need a few things:
                                   
 Fabric - (fat quarters will work) Although I have specified the the fabrics I used, use any fabric you want! I have shown other examples at the end of this post. You will need:
Black with cherries:
 21" x 6 1/2" strip 
Red Cherries:
21" x 5" strip , bottom body of bag
21" x 3" strip , casing
14" x 4" strip, handle
7" circle, bottom of bag
Lining (red check):
21" x 13", body of bag lining
7" circle, bottom of bag lining
Felt or batting (for inner lining to give body and insulation)
21" x 13"
7" circle, bottom
Ribbon -
1 yard of red for drawstring
various 3" pieces to coordinate with bag fabrics


1. Gather your materials and cut your circles and strips the sizes given above.  (Note: I show green fleece, but when it was too stretchy, I changed to felt as the inner lining. Batting also works!)
2. Fold the 3" pieces of ribbon in half and pin along the top of the red cherry 21" x 5" strip, raw edges at the top. Mine are spaced about 3/4" apart.
3. Pin the top of the bag (the 21" x 6 1/2" strip of black) right sides together over the ribbons.  Sew together with a 1/4" seam.
4. Press seams so that ribbons face down.
5. Right sides together, sew 5/8" side seams.
6. Using a 5/8" seam, sew the circle bottom (red cherries) to the tube formed when you sewed the side seams. Sew right sides together. Turn the bag right side out. NOTE: You can also sew the bottom circle on BEFORE you sew the side seams. This may be easier for you because you have a little more forgiveness if your circle is not quite the right size. You can then adjust the side seam to make the circle fit!
7.
Stack the felt or batting circle with the lining circle. Sew as one piece, sewing just as you did for the outer bag - sides and then bottom, 5/8" seams. Do not turn.
8. Put lining inside bag, making sure the bottom goes all the way to the bottom of the outer bag. The top will be longer than the lining. You will be trimming it later.
9. Zig-zag together around the top of the outer bag.
10. Trim away the excess lining and inner lining.  

11. Taking the 21" x 3" casing strip, fold in half and press well.
12. Fold in the raw edges 1/4" on one long side and each end  and press.
13.With right sides together and sewing a 1/4" seam, sew the unturned side of the casing to the top of the bag.
14. Using 1 yard of ribbon, (cording would also work), lay the ribbon inside the casing and turn the casing to the back.
15. Pin the turned edge to the back over the seam. Sew down by hand.
16. For the handle, take the 14" strip of the casing fabric and the 13 1/2" strip of felt. Lay the felt in the center of the wrong side of the fabric strip. Turn the edge of one side and each end and press. 
17. Bring both long sides over the felt, making sure the turned edge is on top. Sew  down the middle and across both ends. I made two rows of seams. Do whatever you want here, but be sure you catch the edge of the folded side in it.
18.Pin to the center back (opposite where the ribbons emerge from the casing), straddling the casing, and sew on, anchoring well!
That's it! You have a cute little lunch bag or purse to show off. Change it up by changing fabrics,leaving off the ribbons, putting in piping, adding lace, piecing flying geese along the bottom, or whatever else you might think of. You can change the size, but you'll have to do the math. The strip has to be long enough to go around the circumference of the circle, taking into account the seam allowance.

Here are a few variations you might want to try. The flowers are sewn on before the side seams.
I'm a guest blogger for Madame Samm today (June 27)! If you go  to Sew We Quilt @ Stash Manicure, you will see a tutorial for the little recycled denim bag. 
 
    Because you took the time to visit me today, I'm having a little giveaway. All you have to do is leave me a comment for a chance to win. For a second chance, let me know you are a follower (either a new one or an existing one-  Please do this in a separate comment.) That's all you have to do.  Contest will close Wednesday, July 6, at midnight (CST). What do you have a chance to win? How about 2 patterns of your choice (to be shipped) from B.Bumble & Co.  (this includes new patterns on the What's New page) plus my new little bee pin cushion kit. See it here .
Have fun! Thank you for visiting today!!!
                                             post signature
Related Posts Plugin for WordPress, Blogger...