Buzzings from a quilter who bumbles her way through life!

Tuesday, June 24, 2014

End of June Update on Hill Country House


This is the balcony off the master bedroom at the hill country house. We really enjoy sitting here in the cool dusk listening to the birds and watching for deer to wander into the yard. This time of year, the deer often have tiny fawns following close by.


Sitting there this past weekend, I noticed just how badly the railing needed painting! The paint had faded and was peeling badly.

So the next day I picked up a couple of sanding pads, a small brush, and some black enamel. After working off quite a few calories sanding down all those rails, I used Valspar latex enamel, and I love the result. 
8-fl oz Exterior Satin Satin Black Latex-Base Paint
 Although I could see brush  strokes going on, they leveled out to a smooth finish!  (No, I'm not an affiliate and they have never even heard of me! BUT, if they want to, I'm available! I have a lot more painting to do!) 


I didn't quite finish before I felt a few raindrops and decided to stop and finish later. I will also paint the railings at the entry to the front door. 
Another job was to prepare the new laundry room for the plumber. We had to decide where to put the washer and dryer (when we get one!). We had to remove one of the lower cabinets to make room.


I evidently didn't get a photo of the laundry room after removing part of the countertop and one cabinet. Ignore the protective paper on the floor. The carpet will be pulled out and I will be putting down a floor in this room.
The washer and dryer will hopefully go on the far right in the photo. 
We have new electrical running to the kitchen, dining room and pantry now, so plumbing is next on the list. The plumber said he thought he could get to it this week. I'm hoping he can!
I'm so ready to be finished with the kitchen, but it is still going very slowly. Everything has to be orchestrated. Electrical before plumbing. Plumbing before cabinets. Cabinets before flooring. Flooring before appliances....etc. Waiting is not my best talent!
(crape myrtle trees are blooming!)
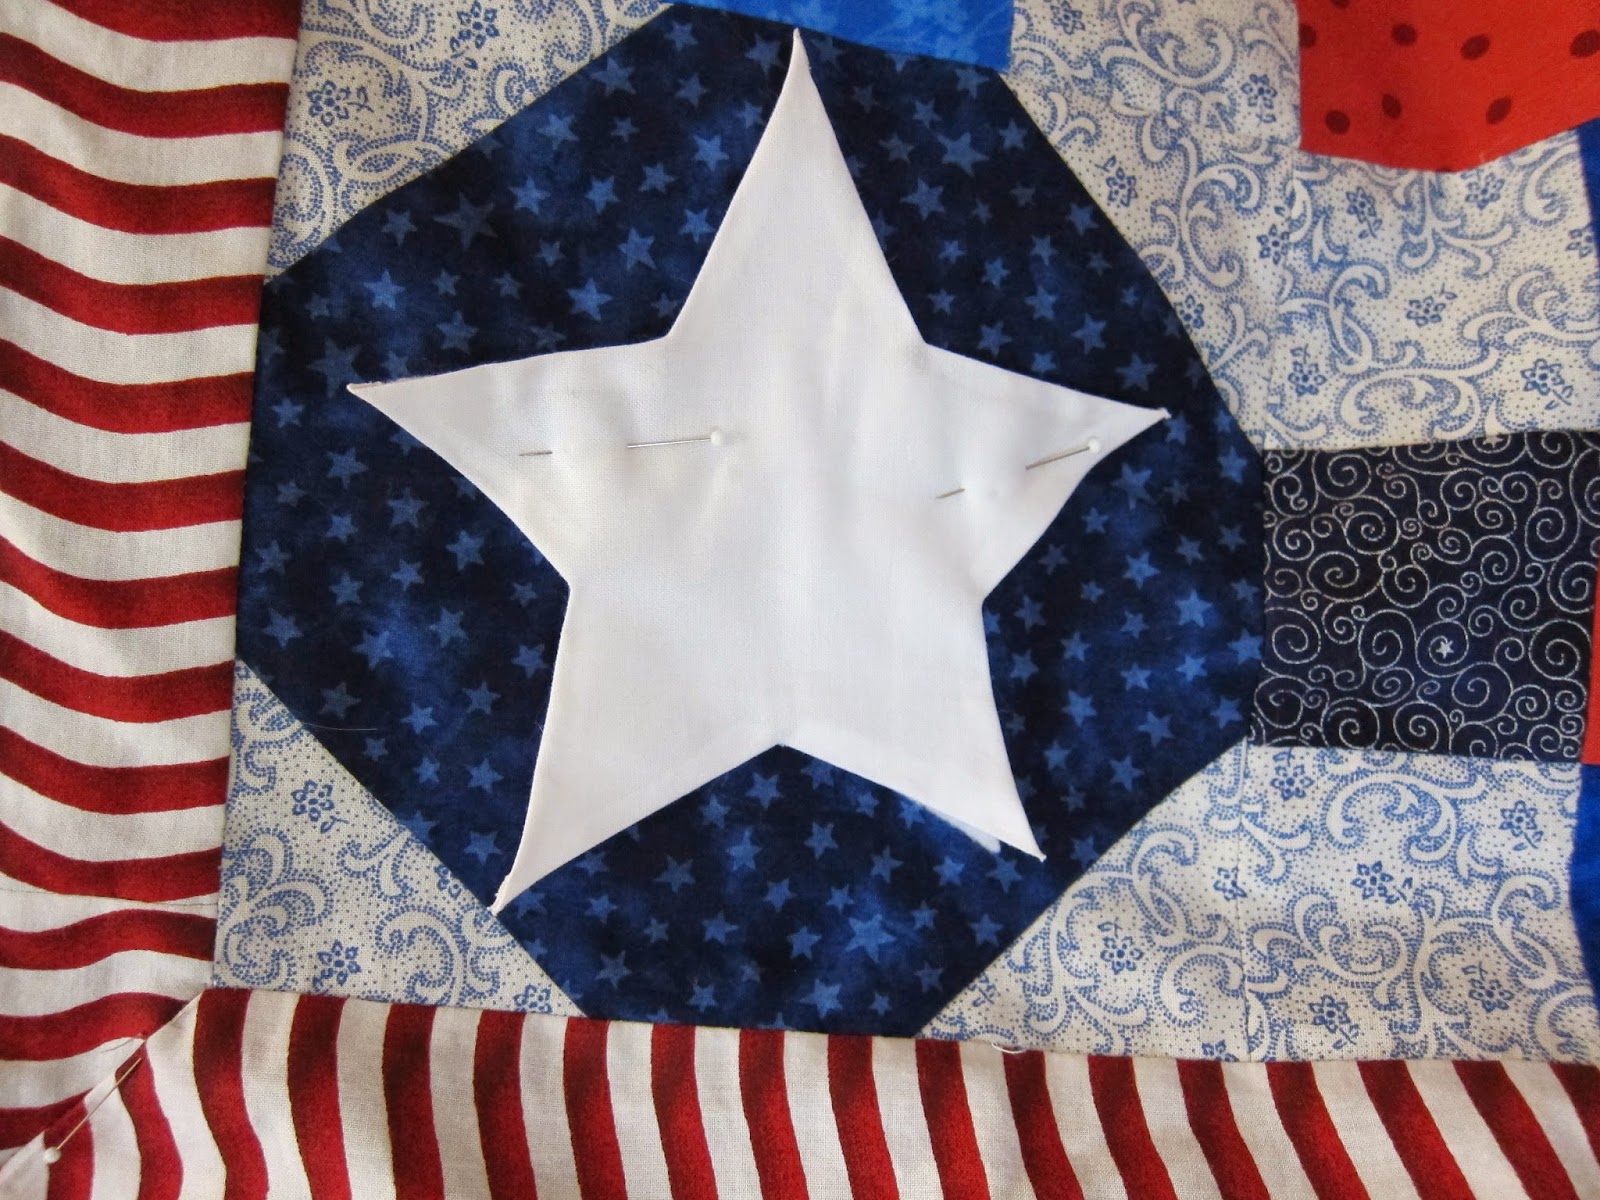
In the meantime, I am continuing to work on the Patriotic quilt. I have two more borders to embroider and 9 stars to applique! 

(a quick photo while work is in progress!)


Thursday, June 19, 2014

Oh Beautiful for Heroes Proved...


I've started a quilt top to put on a quilting frame at my sister's upcoming Independence Day picnic. This will be a huge event and she will have lots of activities for all ages. I suggested a quilt on a quilting frame that people can hand quilt.   I haven't appliqued the stars on yet and I am still embroidering a verse from "America, the Beautiful" around the border. (You might notice that I always line the area to be embroidered with batting. I like the definition it gives the embroidery and it keeps the threads from showing through. I baste the batting to the seams at the top and bottom to keep it in place!)This quilt will be donated to Quilts of Honor when finished and will go to a wounded veteran. If you are from the United States, you probably know the first verse to the song, but have you ever heard the third? 


"Oh beautiful for heroes proved in liberating strife.
Who more than self their country loved and
mercy more than life!
America! America! May God thy gold refine!
Till all success be nobleness 
And every gain divine!"
by Katherine Bates, 1913

I'll show you the entire quilt later when more finished, but I have a couple of tips that you may find helpful. 

First of all, I had to deal with stripes in my border. I decided to miter them for a more pleasant look and I wanted the stripes to meet up as much as I could arrange. These are not uniform stripes, so it was not possible to match them perfectly!


I turned the corner of the border back as shown and matched up the stripes as best I could.  Adjust the end of your border strip until you find the best match. Pin it in place and sew the border on from the previous seamline down.


If you have to piece your border strip to make miter both corners,  it is easier to piece the border somewhere else in the strip and make it look right than it will be at the corner, as you can see below. I "fudged" it a little and found a spot where the seam would be inconspicuous.


When you open and press your border, pin it in place at the corner. You can either turn it back and machine sew it here or sew it by hand (my choice!).  


Trim off the excess.

The other tip is concerning applique. I am appliqueing white stars over a dark blue! As you can see, the background would show through...


so I line the pieces with polyester fleece (the type that is not super stretchy)! It will not "ball up" in the wash. Use a glue stick to keep it in place while you applique. I like to catch the edges in my stitches in a few places to insure it will stay in place.


It will also give a little definition to the stars. I have been doing this for years now and haven't had any problems with it.
Have a wonderful weekend!


Friday, June 13, 2014

Adding a Scalloped Border to an Existing Border


My last post was about my picnic and my picnic quilt. I thought you might enjoy knowing a little trick about a way to "salvage" a border you don't like. In the quilt above, I just didn't like the finished look! I was really in a pickle trying to get this made between spending time with my dad, who was in the hospital, and trips to Kerrville. I decided I should have added scallops to the borders for an extra pop of color and interest. So.....being into applique more than piecing and not wanting to rip out seams, I decided to applique a scalloped border on top.

First, I cut a strip of freezer paper the width of the scallops I wanted. Since it can be ironed and and peeled off to reuse, I just cut a strip half the length of each side. I accordian-folded it and cut my scallops, then ironed it onto the RIGHT side of the fabric. Remember, shiny side DOWN. You don't want the iron to touch that side.) I cut along the edge leaving a 1/4" seam allowance.

I ran a glue stick along the wrong side of the seam allowance at both scalloped edge and straight edge and pinched it back, where the glue held it in place. At this point, I peeled off the paper and repositioned it at the other half of the strip. (Remember, my freezer paper strip was only half the length of my fabric strip, not because it has to be but because it would take a LOT of paper). I then pressed it with an iron.


I pinned it in position and appliqued it on by hand. You could choose to sew it on by machine, if you wish. 
I've actually changed my mind on several quilts and used the applique method to change something that I decided I didn't like. You can applique squares over squares, for example, if you decide you either made a mistake or don't like the placement.
Just have fun with it! No quilt is beyond repair!

Sunday, June 8, 2014

We're Going on a Picnic!

(My great niece and nephew, twins, ready to go on a picnic with Aunt Linda!)
We're going on a picnic!
We're going to have some fun!
We'll find a place to settle
that isn't in the sun!

We'll take a comfy quilt and
we'll spread it on the ground.
We'll look into our basket
to see what can be found!

Oh, look! some yummy veggies!
Let's make a funny face.
Some lips, some hair, some eyebrows - 
and broccoli for some lace!


This game is really funny.
It gives us great big smiles.
The birds can hear us laughing
for miles and miles and miles!


We'll blow some giant bubbles
and chase them through the yard.
We'd like to catch and save them
but that is very hard!


And now our play is over.
It's time to clean and pack,
But one thing you can count on -
we'll soon be coming back!
by Linda Winters


Thank you for joining me for my picnic! My picnic blanket has ants appliqued around the border along with embroidered words to the "Ants are Marching" folk song!   I have chosen to back it with heavy canvas for weight.   


My basket is a $3 thrift store find! (I would love to have one from our sponsor, Peterboro Baskets! I have until September to get one with the discount!)

It has layers of baskets that stack. (It could also be used for sewing supplies.) 


I made a simple carrying case for it out of canvas and lined the basket layers with a vinyl picnic tablecloth, the $2 type, cut to fit.
The laminated snack mats are also canvas with iron-on lamination. The unfinished face in the center was drawn on the canvas with Sharpie marker. 

Your picnickers can use the fresh veggies (carrots, cherry tomatoes, raw broccoli, pepper slices, onion slices, and mushrooms) to make hair and features for the face on their snack mat! The lamination can be simply wiped off when all is finished.
The menu is simple. (These 3 year old twins, my great niece and great nephew, don't eat huge meals!) 
Menu:
Fresh vegetable sticks and pieces 
Ranch dip 
sausage and olive "ants"
Apple Smiles

Be sure to visit my fellow blog hop participants this week! Today, the following blogs are joining me!
  
Monday June 9
Buzzing and Bumbling (You are here!)
Sew We Quilt

Our many thanks to the organizers of this hop, Mdm. Samm of Sew We Quilt, and Mary Winegar of I Piece 2- Mary. What a great idea! 
Thank you for joining me today!


Wednesday, June 4, 2014

Another Chair to Reupholster and More Progress!

I love shopping at thrift stores! The Salvation Army store in Kerrville is really a fun place! We were there last weekend and  I found another chair for $4. I think that it has nice lines.

$4!!!!
I can learn to upholster on this chair and not be terrified of wasting a lot of money! 
I love the carved details on the front legs. I'm thinking this will make a nice "occasional" chair. One to put in a bedroom or something. I have no idea yet what I will cover it with. I really love the very old velvet that is on it, but it is pretty rotten! It needs new support in the seat, also!

We moved the refrigerator in the kitchen (of the hill country house) and I taped off where I wanted the range and range hood, cabinets, etc. to go in that space.  here is my inspiration:
(photo by John Bessler, page 104 in Better Homes and Gardens Kitchen and Bath Ideas magazine, Winter 2013. This magazine is FULL of inspiration!)

We're waiting on electrical and plumbing before the cabinets can go up! I had to go through and decide where I wanted outlets and lights. What a wonderful thing to be able to decide on and not just depend on what is already there!!!
We ended our day with a cookout just for the two of us! My sweet husband did it all! He had two big ribeye steaks (mine is the one in back that is getting a little more cooking time). The corn on the cob seen on the rack was crispy and sweet! The foil container has sliced potatoes and onions. They were my favorite! Wow! The onions just melted and became very sweet!
Speaking of cookouts, be sure to join us for the Perfect Picnic Blog Hop that is going on right now. My day to post is June 9th! 
See you then!


Related Posts Plugin for WordPress, Blogger...