Buzzings from a quilter who bumbles her way through life!

Monday, June 11, 2012

Gift or Storage Basket Tutorial


 Here's an easy little storage container you can make to serve as storage or as a pretty little gift basket. It is just the right size for fat quarters, a pattern, and a few spools of thread. It would make a nice gift for a friend who is learning to quilt or as a nice prize for a quilt guild. Several of these full of fat quarters would look neat and nice on your shelves. At the end of this post, I've listed some other ways you could use this basket.

 This is how I made the basket at the top of the page:
Cut your outer fabric, your lining, and your interfacing (mine is felt, but fleece or even stiff interfacing will work fine) into rectangles  26 1/2" x 24".

 Layer the lining and the interfacing and fold in half lengthwise. Sew the two short ends together.
Also fold the outer fabric and sew in the same way.

Cut a template that is 3 1/8" square. With the fold at the bottom, set the template in each corner (do not include the seam in the measurement!) and cut out. Do this on both pieces. 
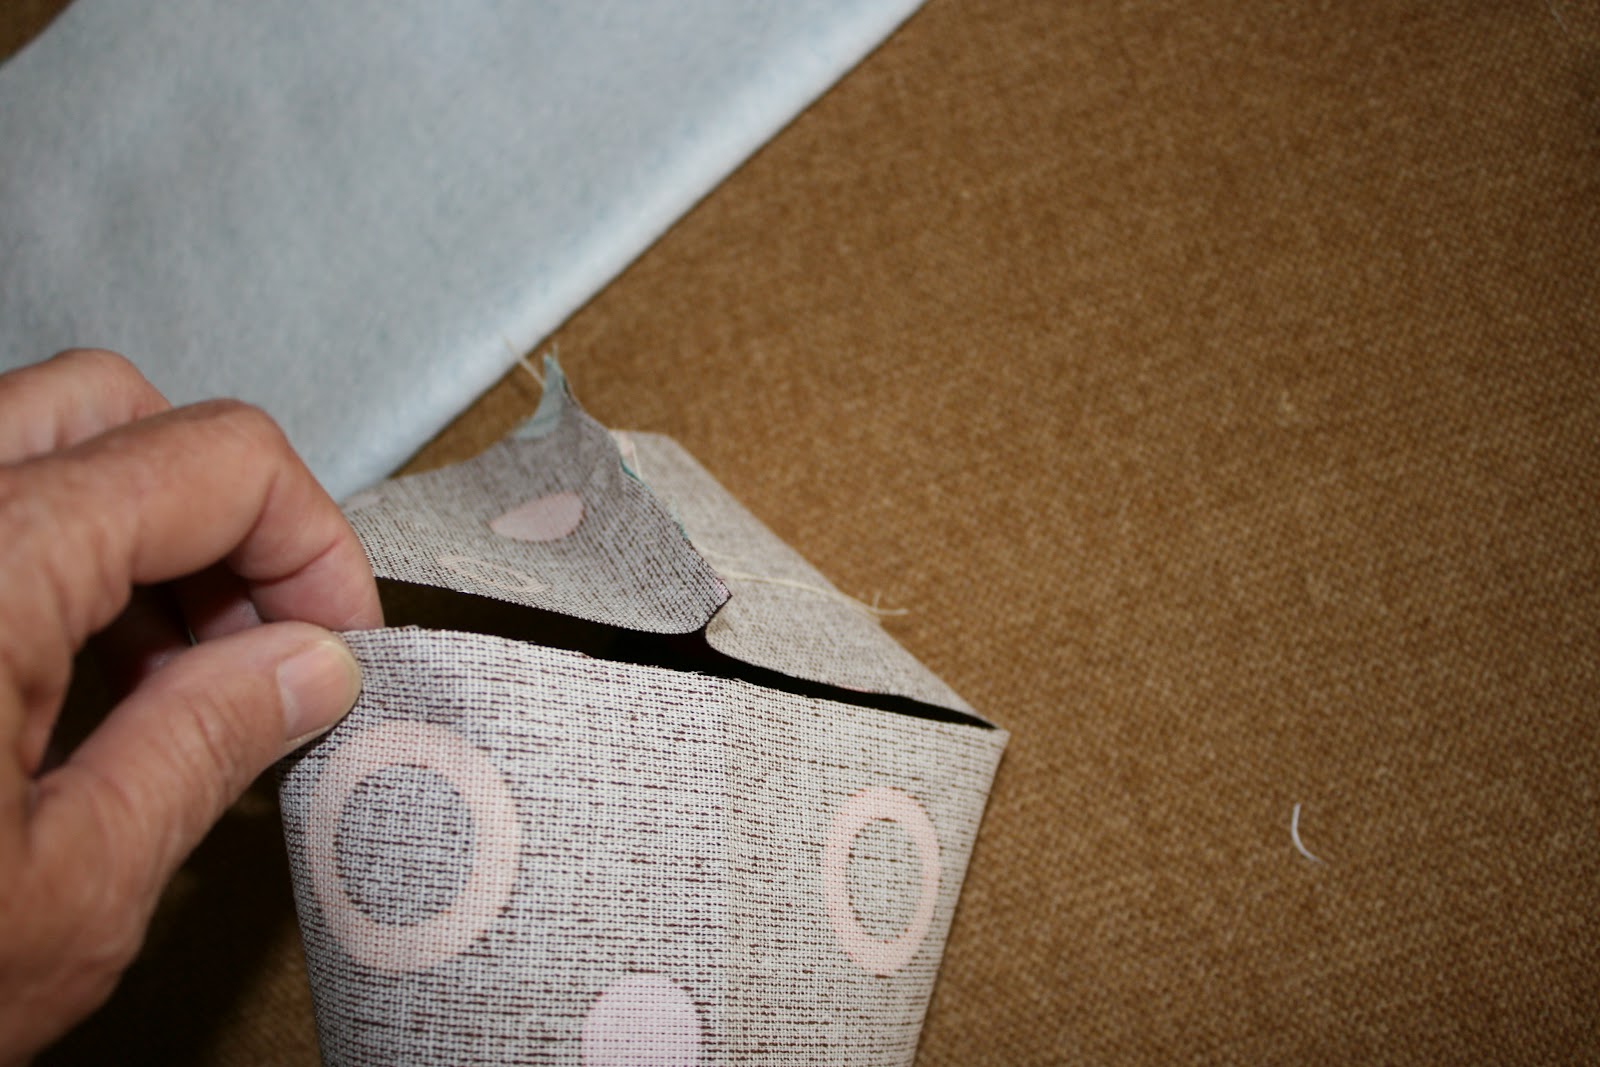
 Now here's the best trick of all! I learned it from Ooh! Pretty Colors several years ago and made a TON (about 50) of "Busy Bags" for the little children at church using this method!  (Thanks, Diane!) Simply open up the corner and bring the middle of the bottom up to meet the side seam (as in the photo above). Pin in place.
 Pin this opening together in both pieces. You will end up with something similar to the picture above.
 Place the bottoms together and re-pin so that the outer fabric, the interfacing, and the lining will be sewn together. Sew across each opening. This will assure your lining and your outer piece will always stay in place! (The "points" in the photo are just the sides of the basket flattened out.)
 Here you see the seams sewn. The outer body fabric is on the underneath, not shown well in this photo. At this point, insert a piece of lightweight cardboard in the bottom, between the outer body fabric and the interfacing. It will be ABOUT 6 1/4" x 8 1/4", but the width of your fabrics can make a difference in this. Measure the bottom to see what yours will be.
Turn inside out so that the outer body is now on the outside.
For handles, cut two strips each 13" x 3". On each, turn under one edge about 1/4". Fold the opposite edge over about 1", then bring the folded edge over this to the side, as shown. I used a glue stick to hold down the folded edges. Now topstitch down each side.
Pin in place on each side of the box, where you want it.
Cut a strip for a binding that is 2 1/2" x about 36". Be sure it is long enough to go all the way around the top of your box. Fold it in half lengthwise, press, and place the raw edges along the top of your outer body (do NOT sew through the lining unless you have used a very stiff interfacing or do not want to add cardboard in the  sides.) Do sew the ends of the handles in place as you sew the binding on. The should be under the binding.
Cut two pieces of cardboard for the ends and two for the sides. Mine were 6 1/2" x 3 1/4" for the ends, and 8 1/2" x 3 1/4" for the sides. (Check yours before cutting. You can always start bigger and trim if needed.)

Insert the cardboard into the sides and the ends between the body and the interfacing. (Although in the photo I do not have the binding sewn on, I ended up having to remove the cardboard after the photo to sew the binding on! Some things you just learn by experience.)
Turn the binding over the top and pin or clip in place. Sew it to the lining, or by sewing through the cardboard back and forth from inside to outside. If you make your cardboard enough shorter than the sides, you may be able to sew by machine by sewing the binding ABOVE the cardboard.
Now fill it with goodies and give it as a gift to yourself or someone else! Here are some other gift ideas using this little basket. Use a fabric that will compliment what you put inside if you want!

1.  candy, bubble solution and wand, small toys, etc. for a child in the hospital. (Check on what is actually allowed for that child first.)
2.  produce from your garden to give to an elderly neighbor. Include some home canned goodies if you have them!
3.  homemade bread for a friend.
4.  apple, pencils, hand lotion, gift card, etc. for a teacher
5. homemade cookies
6.small houseplant, hand lotion, candies for a nursing home resident
7. crayons (the BIG box with LOTS of hues), sketch book, and colored pencils for a child
8. soft, fluffy socks in all colors for an elderly or sick friend
9. tools for a specific need - baby items, kitchen items, toiletries, gardening tools and seeds, off to college, etc.
10. seven little boxes or bags with little treats inside along with scriptures or encouraging notes - one for a depressed or discouraged friend to open each day for a week.

I'm sure I'll think of more things that I will wish I had listed, but you probably have some great ideas of your own. I love the idea of using this to brighten someone's day, but it might be that you need your OWN day brightened.
Until next time.....


post signature 


Friday, June 8, 2012

Cloth Dolls from Hong Kong

 
I have this wonderful little cloth doll in my collection. I've had it for many years, safely tucked away. I bought it at an estate sale. It wasn't in perfect shape when I got it, but for some reason, I really love this little doll.

 She is made of what appears to be a natural colored silk and wears a silk outfit. The baby is dressed to match her. She is stuffed with a fiber that is packed really firmly. (perhaps sawdust or excelsior?)
The baby has the hair style of a little boy, with his head "shaved" except for a queue on top. He is the little brother, or Didi.
Her little fingers are stitched.
The shoes, which are removable, are stamped "Made in Hong Kong". 
The silk in the back is not as faded. You can see the beautiful blue it was originally.
I love to imagine the person, probably a lady, who made this little treasure. Her embroidery stitches are tiny. The little outfit is detailed perfectly. The little shoes are truly shoes that can be taken off and on. She is very similar to the dolls made by Ada Lum, but there is no tag. I believe it was made before 1950, but have no way to prove that except that it appeared very old when I bought it in the 70's and was among other old !
I find myself saying "WOW!". Look at the wonderful things people do with cloth!

If you know anything about these dolls, please let us know in your comments.
Until next time....
post signature

Monday, June 4, 2012

Making Squares From Stripes!


 Stripes or designs with an even repeat can give you a chance to create some really fun effects. This is a good technique to use if you are limited to only one or two fabrics, or you just want to do something fun with your fabrics! In the photo above, I've used my sister's fabric called "Riding the Waves" (available on Spoonflower here) to create these fun, informal squares to use in what will become my latest quilt. The blocks have a different look depending on where I cut. Many of you have tried this - it's not a new idea - but perhaps you've forgotten how useful this little trick can be! It's like pulling in a new fabric with the same colors and design elements. You could make an entire quilt with only one fabric using this method.
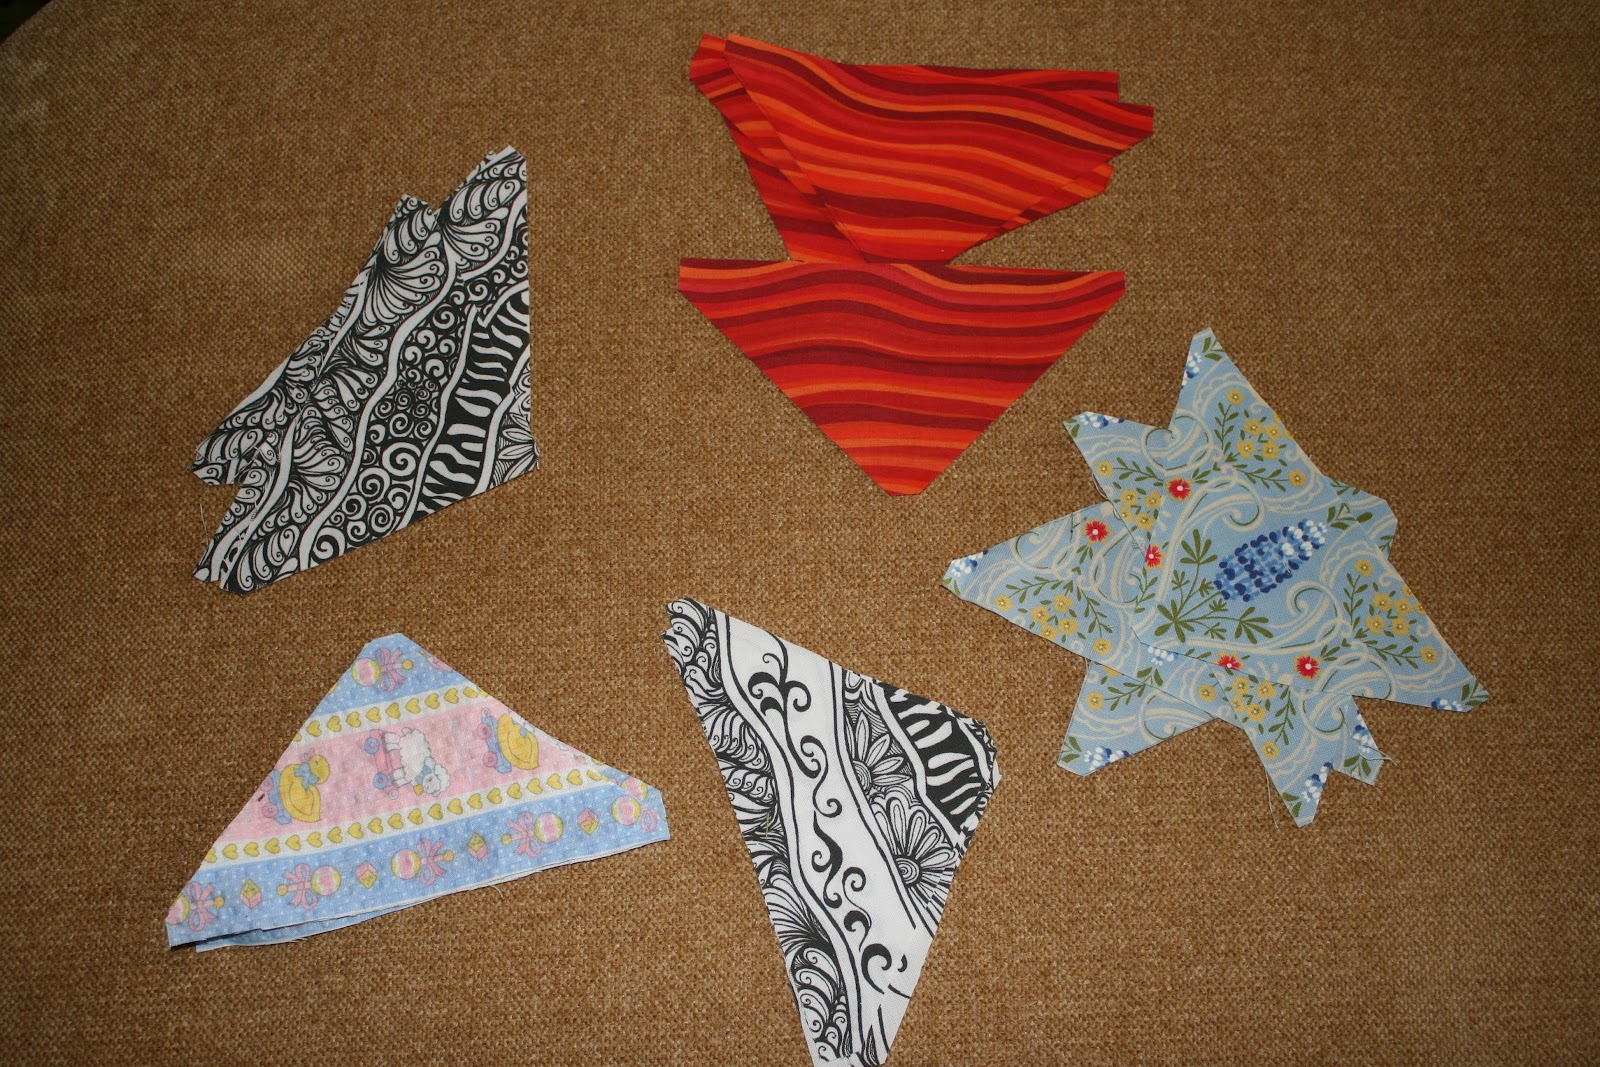
 To begin, you will cut 4 triangles for each square after stacking your fabric in 4 layers. (You will have to figure out the size you need on your own! Of course, each triangle should be 1/2" larger on the two sides you will sew to allow for your seam allowance.)You want each triangle to be exactly alike or in the case of the very informal stripes, make the top of the triangle at the same place on each. I stack the fabric by finding a prominent design element (a flower, a swirl, etc.) and placing that element over the one below it. You will not want your fabric folded in half to do this unless you have an even stripe.  In other words, you want your fabrics to be lined up with the designs all exactly over each other. This is a method used in Kaleidoscope type blocks.
Sew triangles together by first sewing two pieces together and then pressing the seams open. (YES, I do! I find I have less bulk this way.)

 Then sew each half together and again press the seams open. The squares above are the results of these fabrics:
You can add triangles to the sides of these squares to make them bigger and frame them. Can you see the possibilities? This is one of those old tried and true techniques that makes piecing a quilt together fun.

 Try this with some of your fabrics to see what you get! It can be surprising and almost magical! Remember that you will be dealing with some bias edges, so starching your fabric can be helpful in keeping those edges from stretching.

Design in progress.
I searched through all my quilts to find one showing where I had used this technique and it turns out they were all in quilts I gave to grandchildren. The pictures above are of my design wall. I'm working on a design using "Where the Green Fern Grows" (available here). I'm sure I will change it many times before I settle on a final design, but I plan on using the playful blocks made from Riding the Waves. (It will also be used in a border.) My final design will probably look nothing like the above, but it gives you a chance to see how you might use them.
Until next time......


post signature 


Friday, June 1, 2012

An Apple a Day!


The quilt on the left is one of the  first quilts I ever made. It's a strip quilt and I even hand quilted it! I titled it "An Apple a Day".   It's far from perfect, but it served as a great teacher. I tried out several pieced borders and used them as strips (checkerboard, diamonds, points). Strip quilts are perfect for beginning quilters. They are very forgiving if you want to try new things or use up scraps. You don't even need a pattern for a strip quilt! (And even if it isn't perfect, it makes a comfy, cozy cover!) I used apple prints and colors for the theme of this quilt. Speaking of apples..........
Diane McHaney and Bryan Hutzler


 On Memorial Day we headed off north of San Antonio to the Texas Hill Country. 
Here we have winding roads, steep inclines, lush greenery, rivers,lakes, and cooler weather. Dude ranches and resorts abound in this area. Our first stop on this road trip was  Love Creek Orchards. (Check out their website. You can find great recipes as well as other information.)The Apple Store, (associated with Love Creek Orchards) is owned by Bryan (left) and his wife, Staci (not pictured). It offers dwarf apple trees that you can take home and plant, as well as all kinds of jams, jellies, apple cider syrup, and other goodies.We stopped at their Patio Cafe (voted one of the top 40 best small town cafes in Texas) for some Apple Ice Cream! (Delicious with it's subtle apple flavor and cinnamon taste!) They have been featured on the Food Network as well as  various newspapers and magazines, the latest being Texas Monthly magazine. 
 In the picture above, you see Diane holding one of the HUGE, delicious apple pies that helped make them famous. They use 5 lbs. of apples in one pie! Bryan is holding one of the apple trees they sell. Yes, apples grow in Texas. In the hill country, where the winter days can actually get COLD by Texas standards, they grow at least 11 varieties. Love Creek Orchards pioneered apple growing in the hill country.
Carrie Caruso
Diane Langner

Did I mention that the staff is friendly?


My apple strudel, half eaten. Delicious! The sweetest apples ever!


If you're in the vicinity, be sure to check them out. You won't be sorry!
Frio River (notice that the water is clear and clean!)

A couple of old, retired horses near Concan. This is what it means to be "put out to pasture"!

 Although I didn't get a good photo, the entire hill country was blanketed with little yellow flowers. (Everywhere you looked you saw fields of them! They bloom from late April into June.) A little research tells me they are Greenthread (Thelesperma filiform), and that the Texas hill country is covered with literally billions of them this time of year.
                           Until next time....
post signature

Tuesday, May 29, 2012

Finding the Right Background for Applique


 I do a lot of applique. The method I use, seen in this tutorial, allows me to turn under all my edges and layer my pieces before I even put them on the background to sew down. I can see exactly what I'm going to get! In this way, I can find the best possible arrangement and background. 
When I have a design with a lot of pieces, I don't want to take the time to arrange the entire design on each background candidate so I came up with this little trick.


I cut a square of clear vinyl (the type sold for table and furniture covering. It is fairly thick.). My square is about 20" x 24". Make it the size of the largest applique you might do. This is a reusable tool!
 Cover the edges of the vinyl by folding masking tape over the edge. This will be helpful because you don't want to spend time looking for the edges of the vinyl.
Now arrange your applique on the vinyl, sticking the pieces in place with a dab of glue stick (which can later be wiped off with a damp cloth) or pieces of rolled making or transparent tape. I used the glue stick. If you only have one piece, you don't have to do this. 


Now you can move your applique from background to background, and see which you like best! (Sorry about the sideways photo!)
You can easily roll the vinyl (with your applique stuck on) and take it to your quilt shop to "audition" backgrounds! 


By the way, I also use this vinyl to try out quilting designs. I use Dry-Erase Bright Crayons (by Crayola) to try out quilting designs. I can rub off the designs when finished.

Until next time.....
post signature 


Saturday, May 26, 2012

My Garden Inspiration


Purple Heart, red begonia, roses


 Here's hoping you all have a wonderful weekend! If you live in the United States, have a great Memorial Day!

I'm sprucing up my garden this weekend. I LOVE Mexican pottery and I put two birdbaths in my yard yesterday. One in the front, and one in the back.
.
Sago palms, Cinco de Mayo roses
 This post has nothing to do with quilting, but everything to do with my love of color, which greatly influences my quilting! Here are a few shots of my garden. (It is already in the low 90's here during the day!)
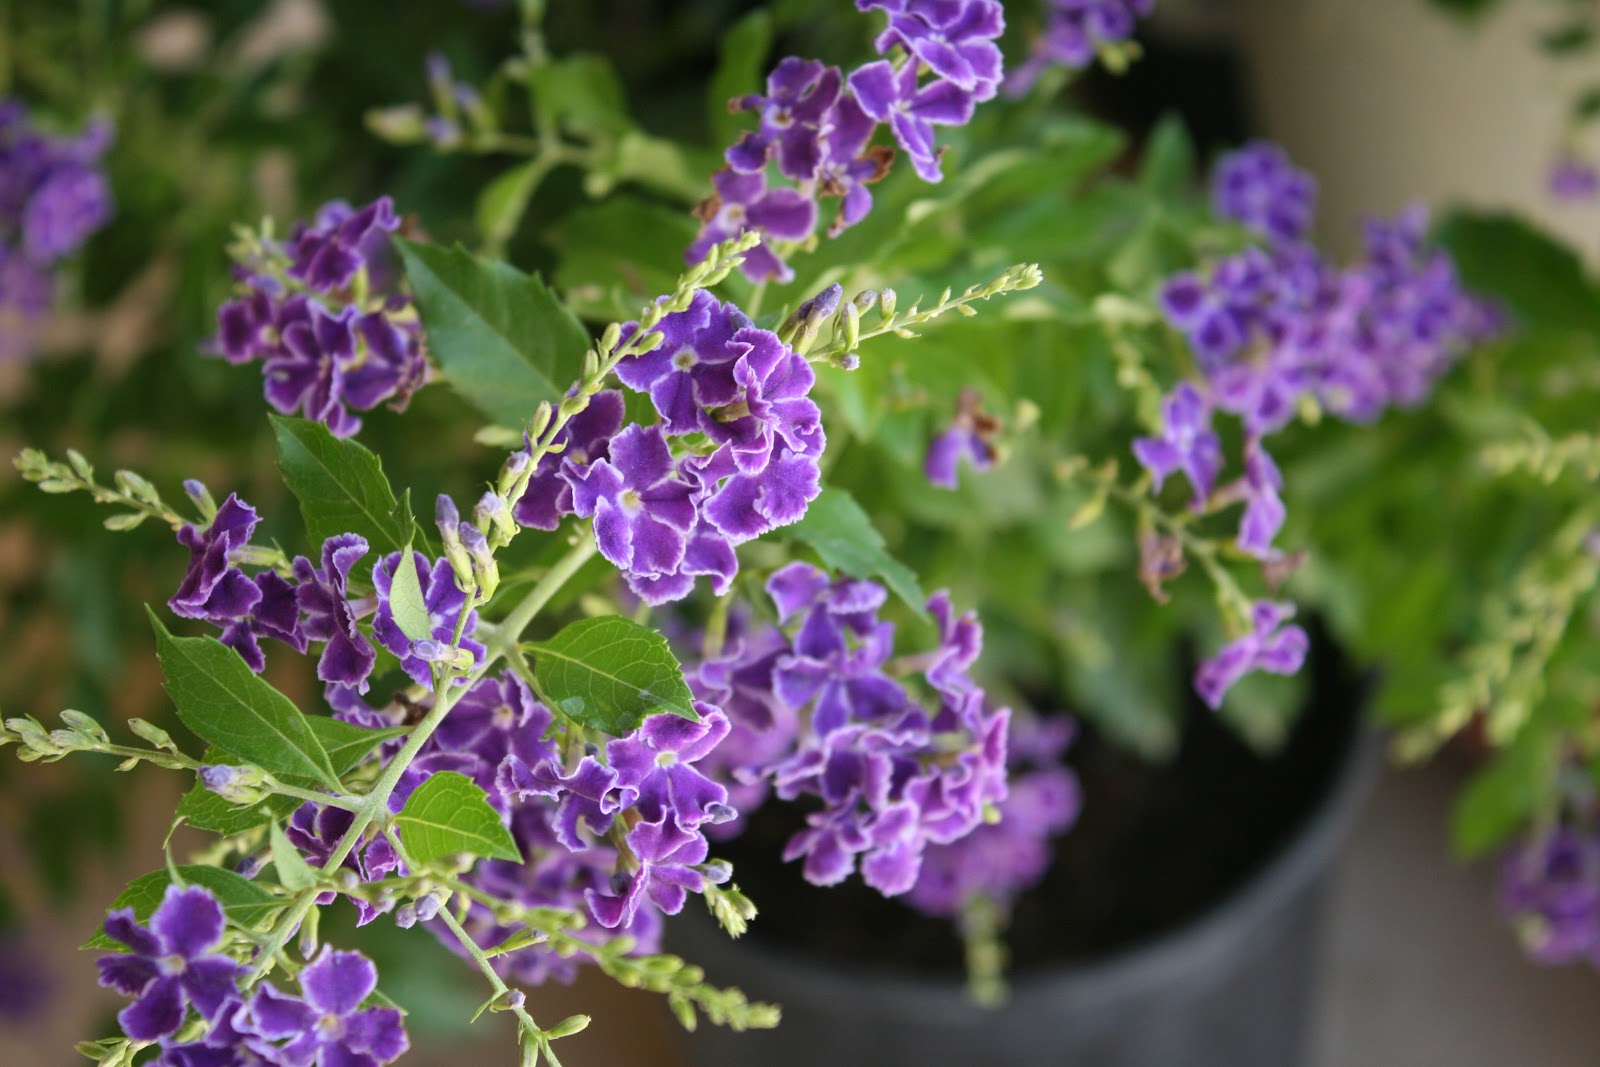
Duranta
Knockout roses, chrysanthemums, and African daisies 

Ixora
Geranium
Cape Plumbago
Bougainvillea
 I will stop there, but I still haven't shown you my red-orange zinnias, my yellow/red/orange lantana, my orange Denver's Dream miniature roses, ......oh, I could go on. I even have orange bougainvillea. Can you tell I love color? Now you know why I avoid quilting with the somber colors like brown. I think we tend to use the colors that make us happy! 
I'll post on Tuesday (Monday is a holiday here) about a tool you can make that will make choosing a background for your applique much easier!
Until then......

post signature 


Related Posts Plugin for WordPress, Blogger...