This little sketch book is easily made and can be put in a bag to carry around. I made some for my grandkids since I will be enjoying them for the next couple of weeks. Although I thought that maybe a good way to encourage them to draw daily would be to decorate a page for each date*, you could sketch out quilt designs, use it as an address book, journal in it, .....whatever you want!
 *If you make a calendar from it, it will stand on its own when opened up like an easel. You can save it for years since the day of the week is not written on it! (I would love for my grandkids to decorate a calendar for me this way. What a great gift!)
These little sketchbooks are easy to carry, small (pages made with 4" x 6" blank index cards). You can make it as simple or fancy as you choose. You can choose to add a pen/pencil holder and ribbon ties. (You could even choose to add a pocket on the front to hold a box of crayons, but I haven't given instructions for that here.You would need to measure your crayon box and allow for that.)
1. You need a pack of blank index cards (4" x 6") and two corrugated cardboard pieces cut 6 1/2" x 5". You will also need batting scraps, fabric, binder rings (1 3/4"), hole punch, and although it can be optional, it helps to have metal eyelets and an eyelet punch.
2. Cover the cardboard with batting (using a glue stick) and punch holes at the top. (Be sure your holes match up on both pieces.) Punch holes in the index cards to match up with the holes in the cover.
3. Cut two strips of fabric each 5 3/4" x 13 3/4". (You will be sewing 1/4" seams, but the cardboard takes up some space.) To add a pen or pencil holder, see step 12. This should be done at this point. To add a ribbon tie at the bottom to tie the sketchbook closed, see stop 13. Both of these additions are very easy to do.
4. Fold each fabric piece in half as shown. You are going to sew up each side (leave the end open) like a pillowcase. Turn right sides out.
5. Slip each piece over the cardboard cover. If your fabric has a directionality to it, pay attention to where the holes are. They should end up at the top. If the batting gets bent down at the corners, slip a ruler or closed scissors point in the smooth it down.

6. Fold the raw edges under and slip stitch closed on each cover. Yes, you're basically slipcovering the cardboard!
7. With the sharp point of a pair of scissors, punch through the holes. Don't make the hole as large as the "hole punched" hole.
8. With an eyelet punch, put an eyelet over each hole. (If you do not have an eyelet punch, you can hand embroider a buttonhole here. You could also do this by machine earlier, but you will need to measure carefully to find the placement for them.) You might also make a little felt "flower" or circle and punch a hole in the center. Then glue it over the hole.
9. Line up the holes in the index cards with the holes in the cover and insert the binder rings. This is the most simple version and you can stop here if you wish. BUT, it is pretty simple to add a little handle:
10. Cut a rectangle of fabric about 2 1/2" x 10". Using a glue stick, fold down three sides of the rectangle 1/4". Cut a double thickness of batting about 3/4" x 8".
 11. Fold the raw edge in over the batting, then fold the opposite side over and bring to the edge. Topstitch down both sides and across the ends to hold it all together. Put an eyelet in each end. Simply slip each eyelet into the binding ring to form a handle.
(I also tried a purchased handle, and although it worked just fine, the handle I had was too big to look right. If you could find a smaller handle, you might want to try this.)
12. To add a pen or pencil holder, simply cut a rectangle about 4" x 2 1/2". Fold the ends in 1/4" and sew down. Fold in half (right sides out) and sew across the top.
Place the tube at the bottom right of the rectangle. You want to to end up inside the cover at the bottom on the back. The pages should fall just above the pencil holder. Keep in mind that you will be sewing a 1/4" seam at the end and the bottom of the rectangle.Turn the top seam under to the back and sew across the top to attach it to the rectangle.
11. Fold the raw edge in over the batting, then fold the opposite side over and bring to the edge. Topstitch down both sides and across the ends to hold it all together. Put an eyelet in each end. Simply slip each eyelet into the binding ring to form a handle.
(I also tried a purchased handle, and although it worked just fine, the handle I had was too big to look right. If you could find a smaller handle, you might want to try this.)
12. To add a pen or pencil holder, simply cut a rectangle about 4" x 2 1/2". Fold the ends in 1/4" and sew down. Fold in half (right sides out) and sew across the top.
Place the tube at the bottom right of the rectangle. You want to to end up inside the cover at the bottom on the back. The pages should fall just above the pencil holder. Keep in mind that you will be sewing a 1/4" seam at the end and the bottom of the rectangle.Turn the top seam under to the back and sew across the top to attach it to the rectangle.
 13. To add ribbon ties at the bottom, place a 12" length of ribbon at the center inside each folded rectangle. Sew the ribbon ends in the seam when you sew across the bottom of the folded rectangle.( Be sure you don't sew the opposite end of the ribbon into the other seam!) When you turn it right sides out, there should be a ribbon at the bottom of each piece. If you decide to do this AFTER sewing your cover, you can always just sew it on by hand at the seam.


 Next up is this "slap ruler" for $1.97. You can give it a little slap and it will curl around your wrist. It comes in handy for quick measuring. I wouldn't use it with my rotary cutter, but it's nice for other things. Because it can be worn like a bracelet, it might be something you could take along to the store to measure design repeats, trim, and things like that.


 These ring bound index cards can be closed with the elastic band at the bottom. The label peels off to reveal a modern quilt design on the cover. It's perfect for carrying your fabric samples and information about your quilts in progress. $1.97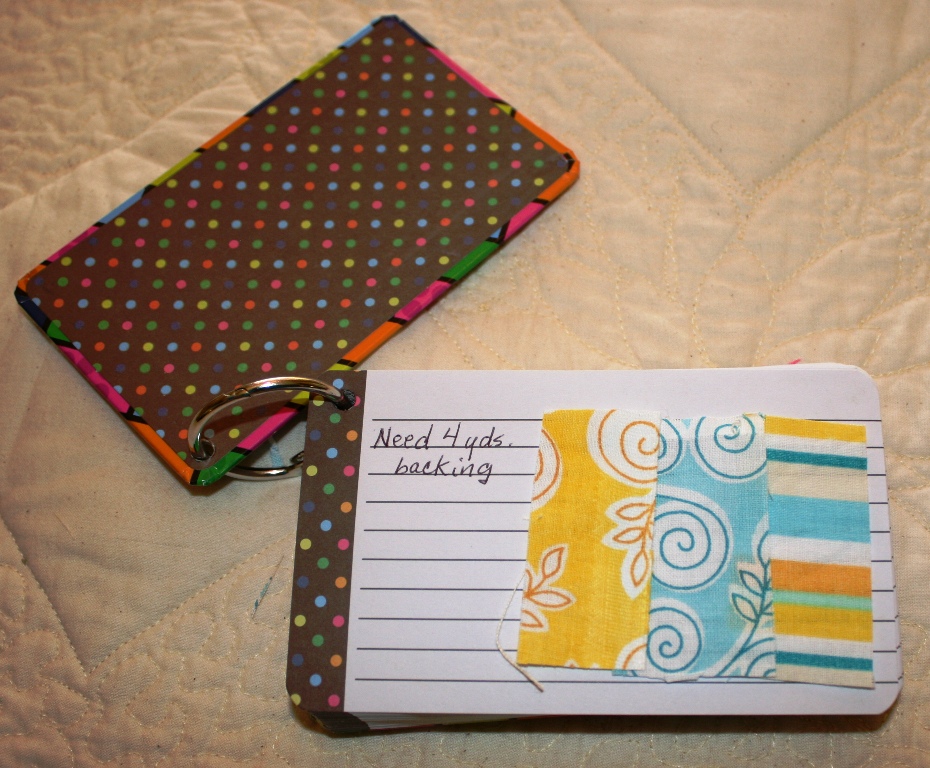

 This nifty little clip board is very simple and is only $1.44. Clipboards are great for holding instructions for your projects.
 This wonderful little Ott Light (it's only about 2 1/4" x 3 1/4"). It has a clip on the back and opens up to reveal a LOT of light! It normally costs $19.99, but I had a half-off coupon. It fits in my purse perfectly. What a great deal for $10!