Buzzings from a quilter who bumbles her way through life!
Showing posts with label purses fat quarters. Show all posts

Friday, April 22, 2011

Tutorial:Leftover Block Envelope Bag

This very simple little envelope bag is going with me on a trip to California. I plan to give it to my granddaughter to use for little things she might want to carry - lunch money, cell phone, little notebook, etc. 
I started out with a variation of the Road to California block. (A hint about where I'm going!) If you want this block in particular, you can find directions here: http://www.blockcentral.com/bom2009-2.shtml
 
1. Start with a finished block. Mine is a 10" block, but any size will work. The bigger the block, the bigger the bag! Layer it with batting and backing. Quilt it and bind it.
Actually, this is the block I started with: (It was a little too plain for me so I used fabric dye and added some color and design! Remember, this is a block I would have thrown out anyway, so I had nothing to lose by experimenting! )
2. Bring three corners up to the middle. I chose to bring the yellow corners to the center for balance. Try different corners to find which is best on your block.


3.Sew the sides of these corners together. It is helpful to turn it inside out to do this. You will have only two seams.
4. Using the same binding (that you bound the block with) turn the raw edges to the center and press. The length will depend on how much strap you want. Mine is 24", but you may want yours longer. Try it out first!
5. Fold the binding in half with the raw edges inside and press. Sew along each side. This forms your strap.
6. Fold under each end of the strap about 1/4" and sew to the top at each side of the bag. I sewed it about 1" below the top because I have the flap overlapping about 1" at the closure. Sew hook and loop tape (or snap, magnetic closure, button, etc.) just below the "junction" of the three corners that you have sewn together. Sew the corresponding hook and loop (or other method) to the top flap. I chose to sew a button on the front of the flap for color.


                       That's all there is to it.
                     Have a wonderful Easter
                       and I'll be back soon!

Monday, April 4, 2011

Project Pouch Tutorial

This quilted "envelope" pouch is 10 1/2" x 13 1/4" finished. It could very easily be larger or smaller by changing the size you cut it. I  made mine a size that could be easily made from fat quarters. It could hold your scissors, your rotary cutter, box of pins, small ruler, and even your folded quilt top. It holds my graph paper note pad, which is longer than a spiral notebook, and there is plenty of room for pencils. It could hold a color book and crayons and could be made in a cute novelty fabric!  I can envision using it to hold items in my suitcase that I don't want flying around loose - like panty hose or jewelry. I can imagine using it for photos, cards, maybe an iPad? Use your imagination. Remember, you can make it larger or smaller, depending on what you intend to use it for. Although it seems like a long process, it is quite easy. I have included photos of steps that most of you are already familiar with, but I didn't want to lose those of you who are new to sewing and quilting.
1. Cut the front piece 21" x 14".
2. To determine placement of applique or embroidery, turn up the bottom to within 6" below the top of the fabric.
3. Add any trim you wish to use to decorate with - applique, embroidery, rick-rack, buttons, etc.
4. Cut the lining piece 22" x 14" (1" longer than the front piece).
5. Cut a piece of batting the same size as your front - 21" x 14".
6. Layer your pieces with right sides together and batting on top. Center the batting 1/4" from each end.
7. Sew a 1/4" seam at one end, sewing the front and lining together. Do not catch the batting in the seam. Pull the front fabric over to meet the fabric edge at the opposite end. Since the lining is 1" longer than the front, it will not lay flat at this point. Turn right side out.
8. Press so the 1/4" of lining shows at each end.
9. Stitch in the seam line on each side. Quilt the piece at this point.
10. Turn the bottom up to within 6" of the top, then turn the top down to meet it. Pin in place.
11. Cut 2 strips of lining fabric each 11" x 1 1/2" (for a wider binding, but them 2" wide.) Turn the raw edges at the ends in about 1/4". Fold in half lengthwise and press well. 
12. Pin raw edges of binding to each side. Folded edge should be to the inside. Sew 1/4" from edge on each side.
13. Turn the folded edge to the back and sew in place over the raw edges. With a binding this narrow, it is helpful to roll the binding to the back with your thumb and finger while pushing the raw edges and batting down out of the way with the needle..
 
14. You can add ribbon closures, button and loop closure, or tab and snap or any other closure you can think of. If you add it before sewing the sides, you can put a zipper in.( Do this before step 10.)
                                               Finished!

Wednesday, September 29, 2010

Updates on Leftover Bags and Doll Clothes


Some of you may remember my 
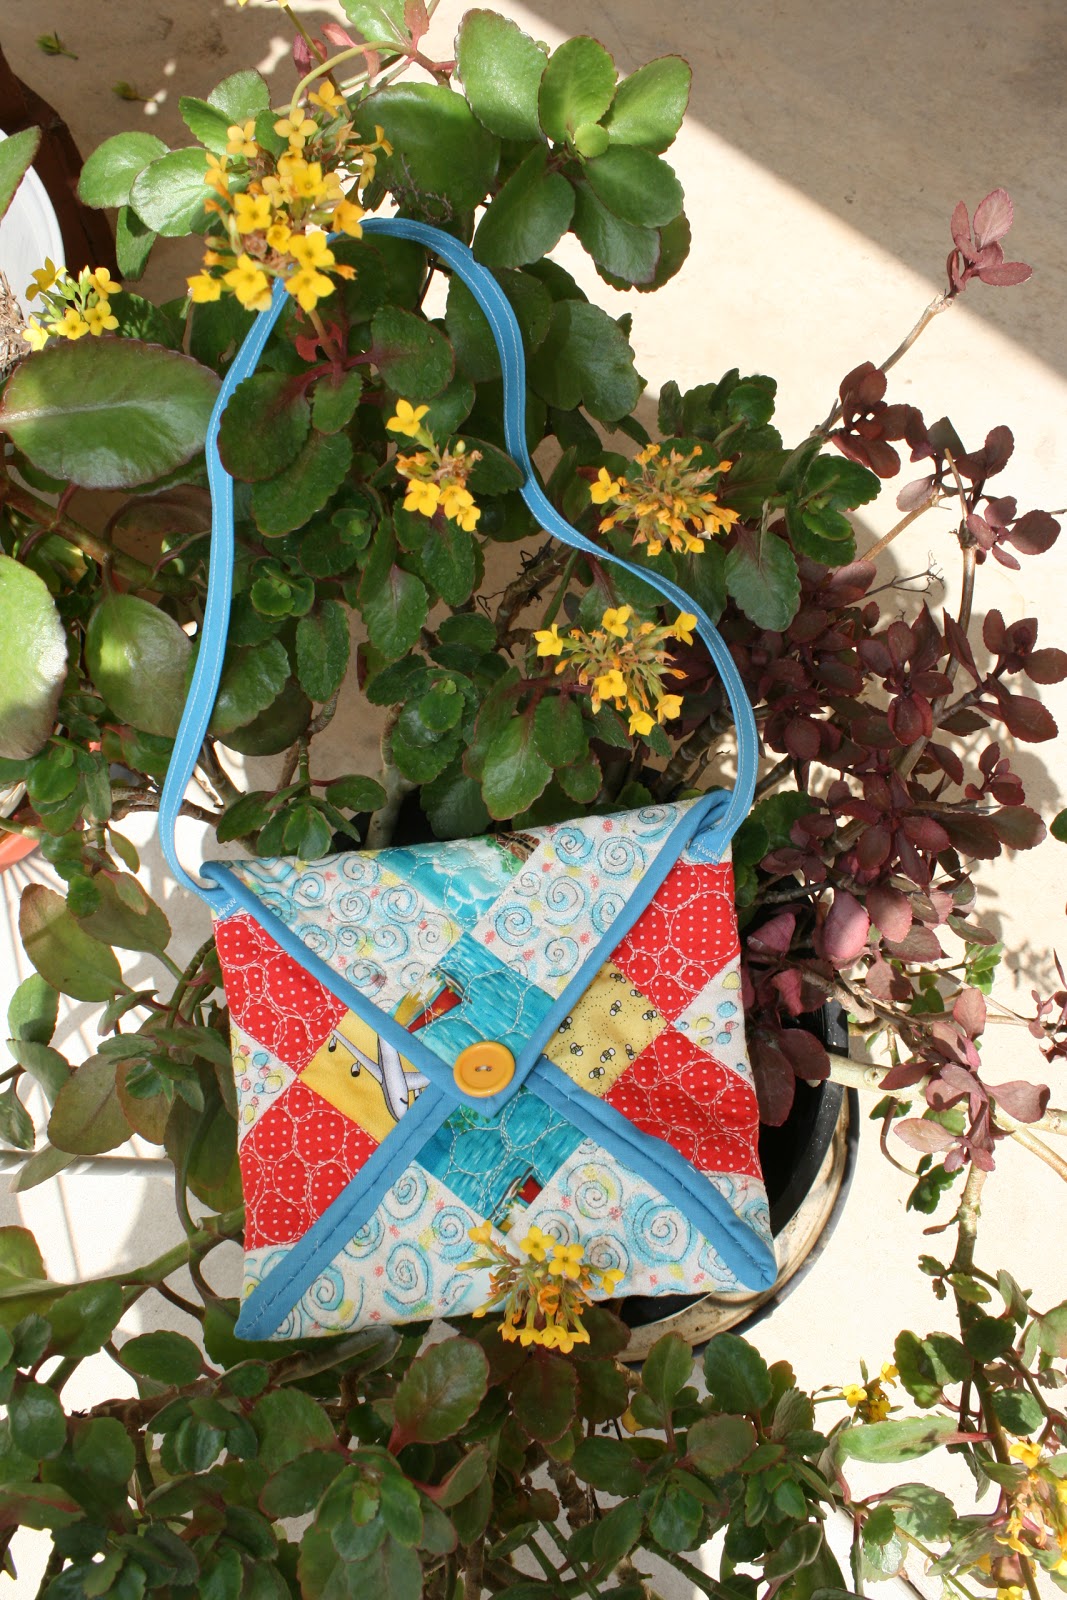
"Leftover Bags" from a couple of posts back. I was playing with a few of the scraps that were left and this is the final result. It is big enough to slip a composition book in and the pocket will hold a cell phone or even a box of crayons! I'm guessing it would also hold an iPad. I know it will easily hold a Kindle with room to spare. I'm going to put it in my gift cabinet until I decide to pull it out and use it myself! These are my kind of colors! I put a very stiff interfacing in it, so it is pretty sturdy.


Here is a view of the back. See my little tag? This was so much fun!


I've also started on new batches of doll clothes for a granddaughter Christmas present. I figure that if I do a little each week, I'll have a healthy batch in time for Christmas! Here are six little pants outfits. (I tried to make little makeshift hangers to keep the pants and tops together. I'll have to work on this idea. I guess I could make little wire hangers?)


Here are the pajamas, robe, house shoes, jumper, dress, and jacket.
I used fat quarters for all of these.


In the meantime, I've been given a Gracie quilting frame that I've set up at my mother's house (she has a huge sewing space!) and we've been researching machines to put on it. This is mid arm size and we want to try to out before we invest in something too expensive. I've always quilted on my domestic machine (a Bernina). All that to say, this has been a busy week. I've also finished a quilt top and started on a new design. (I'll show you more when I get it worked out better.)
Until next time, Have fun with those scraps and fat quarters! By the way, while you're on the internet, go over to the following links and enter for a chance to win a GO! 
                 http://janesfabrics.blogspot.com/2010/09/its-go-for-giveaway.html


                 http://milliesquilting.blogspot.com/2010/09/accuquilt-go-cutter-giveaway.html 
Related Posts Plugin for WordPress, Blogger...