Buzzings from a quilter who bumbles her way through life!

Monday, September 26, 2011

Vintage Quilt and Embroidery Patterns

Quilters and Embroiderers have used patterns for a very long time. This is the way they shared designs and passed them on.  In 1974, my husband and I visited his Aunt Rubye. She was a remarkable "needleworker" who made a living at one time by embroidering monograms on shirts for Neiman-Marcus! (There were enough oil millionaires back then for her to do that!) She was also an accomplished quilter and seamstress. She was born before the turn of the century and learned as a young girl how to sew and embroider. On this visit, Aunt Rubye showed me her "workshop" - a creative jumble of project areas for crafting, sewing, and quilting. She pulled out her embroidery patterns and when she saw my jaw drop over the old patterns, she gave me a few. (I was only 24 at the time and these treasures seemed ancient to me!) I have treasured them over the years. They are extremely special to me, not only because they are old, but because they were hers.


 These embroidery patterns have been transferred to old brown paper grocery bags. They have designs that appear to have been from around the turn of the century. The paper appears to be waxed or oiled, which I'm sure has kept it from falling apart.


 I have no idea when these patterns were produced, but they are Butterick Transfer Patterns and I do know that Butterick made transfer patterns between 1863 and the early to mid 1930's..They are pattern #10436. I was unable to find out anything more than that.


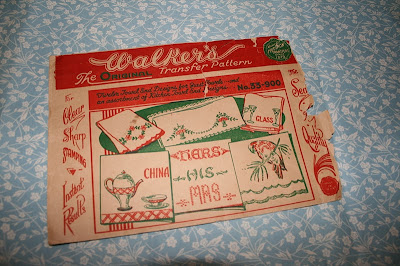
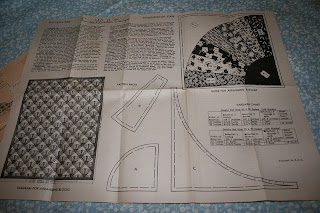
The  patterns below early examples from the Joseph Walker Co. These patterns are from  the late 1930's. The first was designed to iron onto children's clothing, crib covers, pillows, aprons, etc. to "give an embroidered effect". The second was an iron on transfer meant to be embroidered.

The Vogart pattern below was from after 1959, since it included Hawaii and Alaska as states.

Below are some Laura Wheeler Designs. These were sold through newspapers. The first one below is from 1946. The second one (with the baby design) is from 1960.


The last one I will show is also a pattern ordered from the newspaper. The address label on the envelope has been cut from the newspaper and filled out by the person who ordered it. This is from 1976. That was the year when quilting here in the United States had a resurgence. This was the Bi-Centennial year for this country and many "old" crafts were being revisited for fairs, school projects, demonstrations, etc. This soon carried over into home decor. I remember a popular wallpaper  I wanted that had reproductions of old Sears & Roebuck catalog pages from the 1800's. Quilt patterns came out in magazines and many women started quilting again because there was a new appreciation for old crafts. The pattern here is one for a State Bird quilt. 


I really love OLD things like this! I don't know if it's the history behind them that intrigues me, or the "romantic" ideas I form in my imagination about the people using them and the times they lived in. Some day maybe I'll make a quilt with some of these embroidery patterns worked up in the centers of blocks. If nothing else, I feel inspired when I look through them and that's worth a lot to me.

post signature

Monday, September 19, 2011

Leftover Block Snack Bowl - Going Green!


 I'm excited about the project today! It fits all my criteria for a great project - it's easy, it's fast, it uses up leftover blocks or fabrics, it's useful, and it's environmentally responsible!


 This little snack bowl won't hold a serving of beans or mashed potatoes, but it's perfect for a sandwich, chips, veggies, or anything else that's fairly dry. It can be brushed off and reused or washed between usings. Keep those paper or plastic plates out of the landfill and make your children happy at the same time! You can make these little bowls out of blocks you have lying around and in any size you want. You can line them with holiday fabrics. You could even cut up those inexpensive flannel backed tablecloths to use on one side!!!
1. Do you remember this pumpkin snowball tutorial? You may see the little pumpkin peeking out from under that food above. I used this little block for this project because I didn't have time to make more blocks for a quilt (at least before pumpkin season!). Use any block you want (if it doesn't have about a 2" border, add one for the sides of your bowl.)  Layer it with batting and a backing and quilt it as the first step.Do not quilt in the border!  Don't bind it yet. (Sorry there's no picture of this step, but it's pretty straightforward. Cut a square of batting and a square of backing just a little larger than the square you have chosen to make into a bowl. Quilt it enough to hold it all together.)
2. Pinch each corner together and line up the two adjoining sides. Then sew from straight above where the slant ends as shown. This will form the straight sides of your bowl. Do not sew the backing in this.

3. Sew all four corners in this way.
4. Now do the same thing with each corner of the backing. Be sure you put RIGHT sides together to do this.
5. Trim the excess fabric from all corners on the bowl and the backing.
6. Turn up the backing.
7. Cut a strip of binding fabric that is 2" wide. (Length will depend on the size block you use. I just cut across one end of a length of fabric (selvage to selvage) and that was more than enough for my bowl.
8. Place raw edges of binding against raw edges of the top of the bowl and sew all the way around the bowl using a 1/4" seam. Do not miter the corners. 
9. Turn the binding over the edge and hand sew it down. I gave mine a nice press with an iron.
 That's it! This could be folded and placed in a lunch bag. Wouldn't it be fun on a picnic? Or just place it on the table with the appropriate lunch or snack. Any block that comes out square would work. In fact, it would also work with rectangular blocks. You would just have a rectangular bowl (with a more oval top) when you finish!
I might do this the next time I win blocks at my quilt guild!
You can see other pumpkin  block ideas by going to FavQuilts, 12 Free Pumpkin Patterns. 

 Drought update:  Thank you for all the prayers going up for those of us here in Texas suffering from drought and resulting wildfires. Look what we got this weekend! (You can see all the brown grass in the background!)
post signature 


Thursday, September 15, 2011

Easy "Snowball" Pumpkin BlockTutorial


 Most of you who have been quilting for a while know how to make a simple "snowball" block, but I have quite a few readers who are new to quilting or who are teaching beginners to sew. I thought this little pumpkin block might be a good project for them. This tutorial is for the block only. What you do with it when you finish is up to you! You could make several blocks and have a little quilt or wallhanging. It could be used as the front of a bag. How about a table runner or placemats? Maybe three of them in a row could be a nice banner. Just use your imagination! 
1. Cut your a square for your pumpkin. You can use any size you want, but mine is 6 1/2". Cut 4 smaller black squares (mine are 1 3/4"). You don't want your corner squares to be too large or your pumpkin will have pointed sides!
2. Place the black squares in the corners and make a chalk mark as shown diagonally across each.  What is the little blue tool in the photo? Well.......
I happened to see these at the local Walmart. They were cheap - about $1. I thought they looked like they might be 1/4" wide. They are! they are clear, so they work just like a 1/4" ruler!  I have been using them for a lot of things! Measuring 1/4" seams, drawing out straight lines, etc. I have a life time supply and I can pick the color that fits my mood! :o)
3. Okay, back to the tutorial. Sew across each corner just to the right of your lines. (I'm talking a hair's width to the right.
4. Trim the corners off, leaving a 1/4" seam allowance. (You can use your new little tool if you want!)
5. Turn the corners up and press in place.


6. Cut  2 strips (mine are 2 1/2" wide) the length of one side of your block.Sew to opposite sides. Press.
7. Cut 2 more strips the width of the block including the newly sewn strips. Sew these on the remaining opposite sides and press.
8. Repeat steps 6 and 7 to add another border to your block. You can make these strips the same width or wider.l Mine are 3 1/2" wide. 
 This block as it is is called a "Snowball" block. You can stop here and you'll have a classic block that you can make into a nice quilt. You can leave off the border strips and when you sew your snowballs together, the corners will make little squares. But if you want a pumpkin........

9. Put a scrap of batting behind the pumpkin shape. I used cotton batting, but for a little more definition you can use polyester. Make sure it is large enough to cover the edges of your pumpkin.
10. Turn the block over and stitch in the seam line of the pumpkin.
11. With chalk, mark curved lines from the center of the top to the center of the bottom to give your pumpkin it's "ridges". Sew along these lines.
12. Trim the batting that sticks out beyond the pumpkin shape.
13.To make a leaf, draw out a simple leaf shape (you can trace a real leaf if you want) onto the dull side of freezer paper. Place the SHINY side down against the  RIGHT side of a scrap of green fabric. (You don't want to touch the shiny side with your hot iron!) Press the dull side of the freezer paper and the shiny side will stick to your fabric. Don't worry. It will peel off and can be ironed on again several times. It will not hurt your fabric! Cut it out leaving a narrow seam allowance.
14.Turn the shape over to the WRONG side and run a line of glue stick along the seam allowance. (Clip any curves.) Using a pinching motion, turn the edges in leaving the fold even with the edge of the freezer paper.
15. Peel off the paper. Use chalk to draw in a tendril that you will embroider with green floss. Add a little stem, if desired. I used a little tab of fabric with the edges folded in.
16. Back the leaf with a scrap of batting.
17. Sew in veins for the leaves and then sew around the edges, keeping your stitches as close to the edge as possible.
18. Sew the stem on the same way. Embroider your tendril.

                                     That's all there is to it! Easy, right? 


post signature

Friday, September 9, 2011

Easy 3-D Starburst Tutorial


I'm using bandanas (97 cents each at Walmart) to show you a very easy technique that gives you a starburst at each intersection of your blocks. Mine will be a Halloween Tablecloth when finished, but you can use this technique for quilts also.

1. Trim the rolled edges off your bandanas. You will also want to trim them all to the same size, as they will probably not be exactly square.
2. Cut 4 squares for each intersection in your tablecloth center.  I cut my squares 5", but if you want larger "starbursts", cut them bigger. I used fabric from my stash for this. Fold each in half diagonally and press.
3. Fold each in half diagonally again and press. You have made prairie points.
4. Pin the raw edges of a prairie point at the edge of your bandana. You can place it closer to the end if you want your points to come together. I planned on an applique circle over mine, so I left a little space. I have placed the open end of the prairie point toward the center of what will be the starburst.( If you place the open end to the outside of the starburst center, you will reverse the direction of each "ray" of the starburst. You may prefer this! It would look more like a flower petal.) 
5. Pin the second bandana over this, right sides together, and sew a 1/4" seam, catching the prairie point in the seam. Press the seams open.
6. Turn over and catch the open side of the prairie point with your finger and......
7. ....flatten so that the folded edge runs down the center. Press well. I use a little spray starch to help it stay in place. You may choose to leave this 3-D, but you can also stitch it down so that it stays flat.
8. Repeat for the two ends perpendicular to the seam you have just sewn. Make sure you place the open end of the prairie points toward the center, unless you have chosen to do the opposite.
9. Repeat steps 4 and 5 for the side you will sew to this. (Pay attention to the colors if you want alternating blocks.) Place right sides together, lining up your seams. Sew a 1/4" seam. Press seams open and flatten the starburst. Press well.
10. In this photo you can see how I've left a space between the ends of my star points. You can make them meet by placing the prairie points closer to the end of each square. You can also see how by placing the open end of each prairie point away from the center, you can make the long points meet in the middle instead of the short points. This is a matter of choice.
11. I chose to applique a circle in the center. You could use a button here. If you brought your points together, you may choose to not put anything in the center.
12. If making this as a tablecloth, sew as many blocks together as you need for the size you want, then add a border all the way around. Mine is not sewn yet, but you can see the look I'm going for! I can even buy some extra bandanas to use as napkins! Since I have turquoise Fiesta dinner plates, I think they will look great with my choices. A few pumpkins as a centerpiece and I'm all set!

That's all there is to it! Make as many blocks as you want and as big as you want. Remember that you don't have to use bandanas for this and that it doesn't have to be a tablecloth. This is a great technique for a quilt also!
post signature


Related Posts Plugin for WordPress, Blogger...