Buzzings from a quilter who bumbles her way through life!
Showing posts with label applique. Show all posts

Thursday, March 19, 2015

Meet and Greet - This is Me!


"Coffee Time"
Applique is the closest thing to painting with fabric that I have found. (except for actually painting ON fabric!)
I love finding fabrics that have textural prints that I can use to give the illusion of other things - sand, leaves, sky, etc. I tend to keep a box of "Textures" that I go to first when trying to create an applique. 
The quilt below used only solids, but many shades of each color.

Roses in bloom on a quilt I made for a blog hop in late 2013

 The bookcase quilt below was a custom quilt made before I started blogging. Every item on the quilt, including the words, were of importance to the recipient of the quilt. I hand dyed the variegated ivy leaves for realism.


"Creativity"
I have a very unusual method of applique that I came up with when I first started quilting. (I have since seen this method in a couple of other places as well. Great minds think alike!)  In actuality, I was having so much trouble with needle turn applique, I HAD to come up with something else. I also wanted turned under edges so my pieces would be more durable. Note: This method uses freezer paper, but it is NOT ironed to the BACK of the fabric!


Thank you for joining me today!!
You can see what others are doing by going to the list here!
                                                                      

Sunday, March 15, 2015

Bird Tree Blog Hop - My Day!

appliqued and embroidered pillow case border

The sun finally came out, but shadows couldn't be avoided!

Welcome to the Bird Tree Blog Hop! I really like birds, so I was very attracted this beautiful fabric by Tracy Lizotte for Elizabeth's Studio! It's called "Beautiful Birds". I decided to make a bedding set for a twin bed with fabrics from this line.

appliqued nest

I chose to cut the fabric into squares and sew a simple patchwork quilt with an appliqued border. This quilt fits a twin sized bed.

 I made pillow cases from some of the fabric and embroidered and appliqued a purchased sheet and pillow case to coordinate. I added a ruffle to the border of the sheet along with a verse and coordinating flange.
 I made throw pillows of the tree panel and a bolster pillow from the lining. When the top sheet is turned down over the top of the quilt, the ruffle and verse show.
Sugarplum was suddenly on "hunter alert" and was very fascinated with the birds! (That's how well they're illustrated!)

She finally settled down and relaxed.

Because of all the rain we've had lately, the days have been a little gloomy and dark. I found the sewing machine LED lighting kit by Inspired LED made my sewing a de-LIGHT!!! You can't imagine just how much easier it is to sew when the lighting is really good. This kit is easy to add to your machine and you won't believe the difference it will make to your sewing. You will be able to see so much better!!! You can read about them on their website here. For about $30 you can actually see to sew! I strongly recommend it!
Sewing Machine LED Lighting Kit
photo from the Inspired LED website showing how bright the light can be!
Before you go, be sure to visit my friends on the hop today!

                                  Monday, March 16
Sew Peace To Peace
Moose Stash Quilting
Buzzing and Bumbling
I Piece 2 Mary
Quilt Doodles
Just Let Me Quilt
Les Quilts
A Stitch In Time


Thursday, June 19, 2014

Oh Beautiful for Heroes Proved...


I've started a quilt top to put on a quilting frame at my sister's upcoming Independence Day picnic. This will be a huge event and she will have lots of activities for all ages. I suggested a quilt on a quilting frame that people can hand quilt.   I haven't appliqued the stars on yet and I am still embroidering a verse from "America, the Beautiful" around the border. (You might notice that I always line the area to be embroidered with batting. I like the definition it gives the embroidery and it keeps the threads from showing through. I baste the batting to the seams at the top and bottom to keep it in place!)This quilt will be donated to Quilts of Honor when finished and will go to a wounded veteran. If you are from the United States, you probably know the first verse to the song, but have you ever heard the third? 


"Oh beautiful for heroes proved in liberating strife.
Who more than self their country loved and
mercy more than life!
America! America! May God thy gold refine!
Till all success be nobleness 
And every gain divine!"
by Katherine Bates, 1913

I'll show you the entire quilt later when more finished, but I have a couple of tips that you may find helpful. 

First of all, I had to deal with stripes in my border. I decided to miter them for a more pleasant look and I wanted the stripes to meet up as much as I could arrange. These are not uniform stripes, so it was not possible to match them perfectly!


I turned the corner of the border back as shown and matched up the stripes as best I could.  Adjust the end of your border strip until you find the best match. Pin it in place and sew the border on from the previous seamline down.


If you have to piece your border strip to make miter both corners,  it is easier to piece the border somewhere else in the strip and make it look right than it will be at the corner, as you can see below. I "fudged" it a little and found a spot where the seam would be inconspicuous.


When you open and press your border, pin it in place at the corner. You can either turn it back and machine sew it here or sew it by hand (my choice!).  


Trim off the excess.

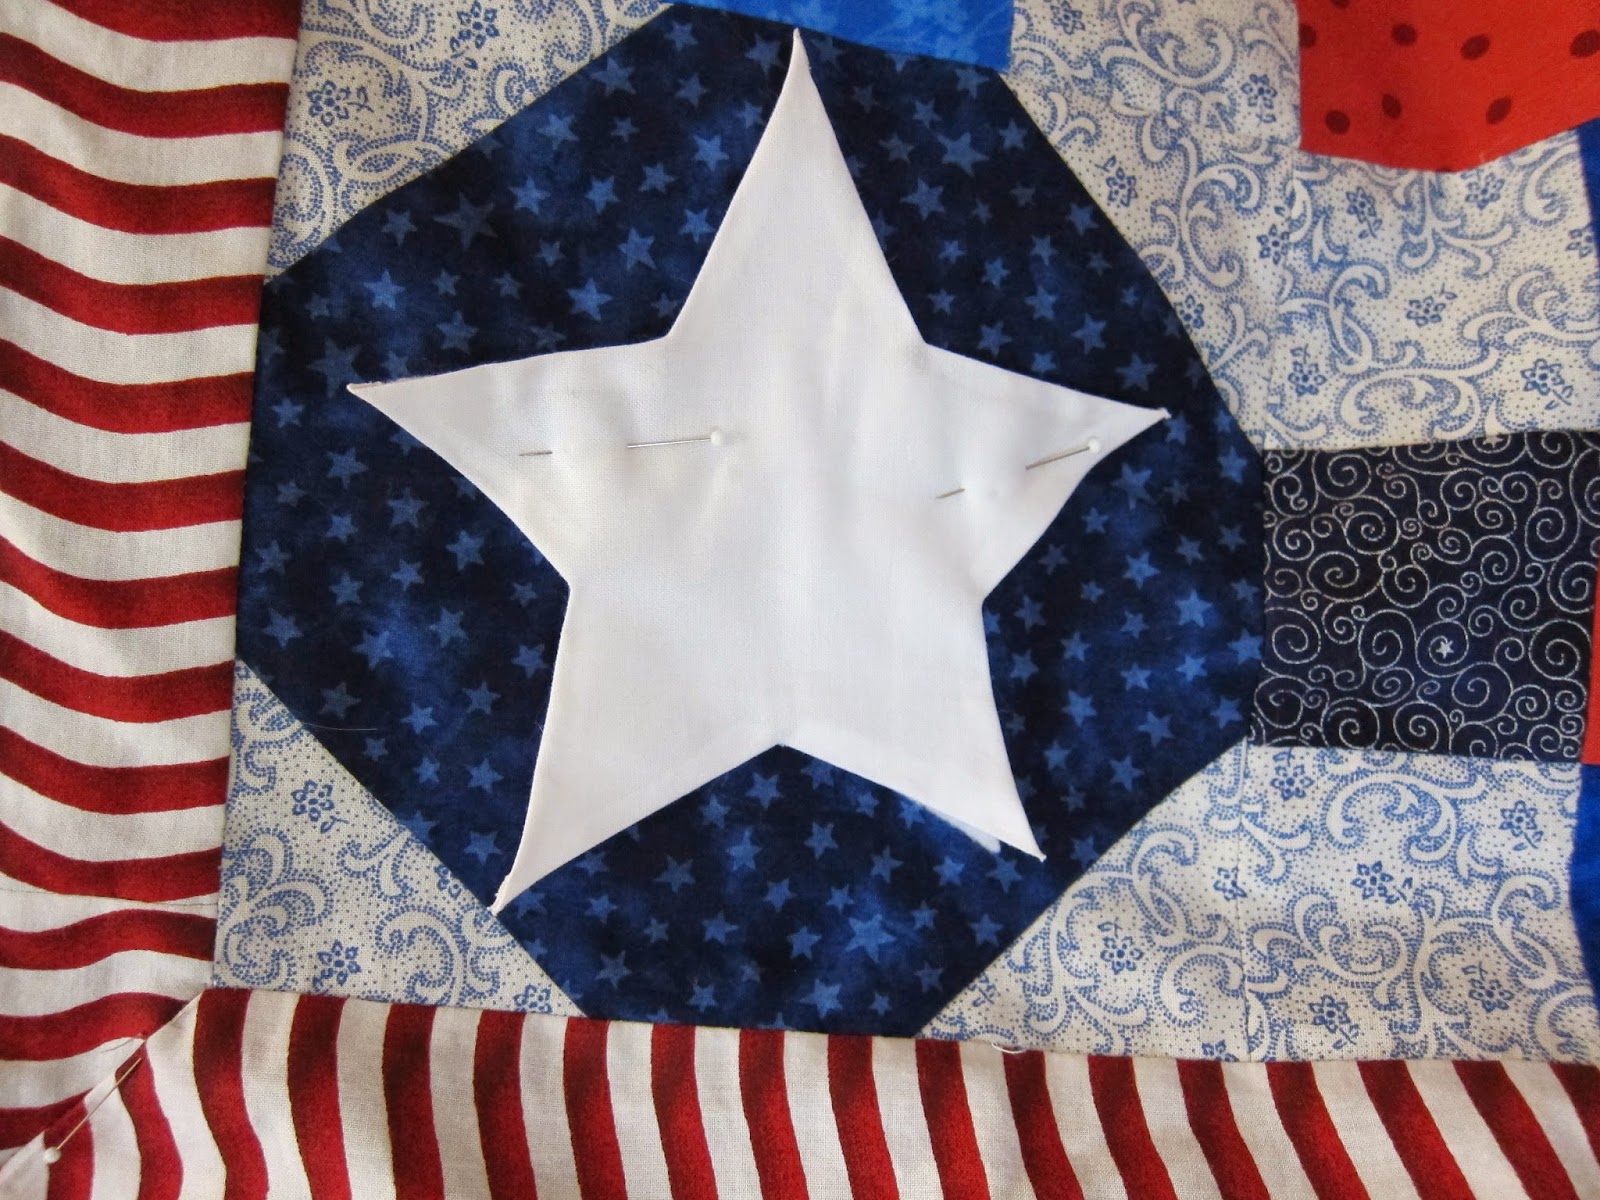
The other tip is concerning applique. I am appliqueing white stars over a dark blue! As you can see, the background would show through...


so I line the pieces with polyester fleece (the type that is not super stretchy)! It will not "ball up" in the wash. Use a glue stick to keep it in place while you applique. I like to catch the edges in my stitches in a few places to insure it will stay in place.


It will also give a little definition to the stars. I have been doing this for years now and haven't had any problems with it.
Have a wonderful weekend!


Friday, June 13, 2014

Adding a Scalloped Border to an Existing Border


My last post was about my picnic and my picnic quilt. I thought you might enjoy knowing a little trick about a way to "salvage" a border you don't like. In the quilt above, I just didn't like the finished look! I was really in a pickle trying to get this made between spending time with my dad, who was in the hospital, and trips to Kerrville. I decided I should have added scallops to the borders for an extra pop of color and interest. So.....being into applique more than piecing and not wanting to rip out seams, I decided to applique a scalloped border on top.

First, I cut a strip of freezer paper the width of the scallops I wanted. Since it can be ironed and and peeled off to reuse, I just cut a strip half the length of each side. I accordian-folded it and cut my scallops, then ironed it onto the RIGHT side of the fabric. Remember, shiny side DOWN. You don't want the iron to touch that side.) I cut along the edge leaving a 1/4" seam allowance.

I ran a glue stick along the wrong side of the seam allowance at both scalloped edge and straight edge and pinched it back, where the glue held it in place. At this point, I peeled off the paper and repositioned it at the other half of the strip. (Remember, my freezer paper strip was only half the length of my fabric strip, not because it has to be but because it would take a LOT of paper). I then pressed it with an iron.


I pinned it in position and appliqued it on by hand. You could choose to sew it on by machine, if you wish. 
I've actually changed my mind on several quilts and used the applique method to change something that I decided I didn't like. You can applique squares over squares, for example, if you decide you either made a mistake or don't like the placement.
Just have fun with it! No quilt is beyond repair!

Sunday, January 19, 2014

Wake Up to Kona ! My Day!

Today is my day to "Shine" in the Wake Up to Kona Blog Hop! Actually, there are many of us shining in this hop and I think you will be inspired by all the pretty quilts and projects made from Kona Solids. 
                        

I used the fat quarter bundle of Sunrise solids. These colors are so beautiful and cheerful, how could I do anything but enjoy working with them! They are such good quality and so pretty! I used Aurafil threads to do my quilting, of course!

These colors reminded me of the Cinco de Mayo roses I used to have. (I actually still have one that I will take with me to a new house!) They start out bright orange and go through reds and pinks as the flower opens and fades.


If you've followed me for very long, you know I love to add words and verses to my quilts. I embroidered a verse on the bottom and right side border on this quilt: "The whole earth is filled with awe at your wonders; where morning dawns, where evening fades, you call forth songs of joy." Psalm 65:8. (I balanced the design by placing prairie points at the top and left side borders.) Here is my "sunrise" quilt in the golden light of the setting sun. 


I had so much fabric left over, I also made a "puff" or "biscuit" quilt using some of my leftovers. I embellished it with a few stuffed flowers.

I also received Amanda Murphy's book Color Essentials, Crisp and Vibrant Quilts. Although I didn't make a pattern from the book, there are many in it that I'm sure I will make in the future. The book is very inspirational.  
                                                   
 I now have two new colorful quilts I can use somewhere in my new house! Update: For those of you wondering where we are in the "getting back on our feet" process after the fire, we have a contract on a house. I will be posting about it after we close, which will be very soon.)
 My thanks to Mdm. Samm of Sew We Quilt and to Carol of Just Let Me Quilt for putting this great hop together! In my mind, you can't go wrong when you're dealing with cheerful colors! 
            Be sure you visit the other blogs in the hop today! 

                 
January 20


                                      Sew Incredibly Crazy


Thursday, September 5, 2013

Just How Hard is Freezer Paper Applique?

"There Was an Old Lady Who Swallowed a Fly"

Some of you have expressed concern that applique looks too complicated. I think you would be surprised at just how easy it can be. There are methods that are more complicated than others, but after trying them all when I first started, this is the method I settled on. I use a freezer paper method where the freezer paper is ironed to the RIGHT side of the fabric and the seam allowance is turned to the back using a glue stick.
There are several reasons I love this method:
  •  First, it is simple. This is something a beginner can do. Really!I've taught this as a class and the most common comment I hear is, "Oh, this is so much easier than the way I've been doing it! I can do this!"
    Large figures make for really easy applique!
  •  Second, what you see is what you get. Your edges are turned under and ready to sew before you even lay the pieces out on your background. That means you can see exactly what it will look like. You can change colors or fabrics at this point if you are not pleased with what you see, you haven't invested a lot of time in it yet.
  • Since your edges are turned under and ready, you can concentrate on your stitches.
  • Since the freezer paper is ironed to the FRONT of the fabric, you don't have to disturb your seams when you remove it.
  • You are not committed to hand applique. You can easily sew the pieces down by machine, but you have no raw edges. This means your applique will hold up to some real use.
    Tropical quilt with appliqued flowers for my granddaughter's room
  • You do not need to reverse your images when you trace them off. You trace it exactly as it will look when you finish.

    If you are interested in seeing a detailed tutorial of this method, go here. I also have some previous posts that you might find helpful for applique: (just click on the subject you are interested in)


 Finding the Right Background for Applique
Related Posts Plugin for WordPress, Blogger...