Buzzings from a quilter who bumbles her way through life!
Showing posts with label table settings. Show all posts

Tuesday, September 3, 2019

Making a Tablecloth for a Large Round Table


I love setting a pretty table. 
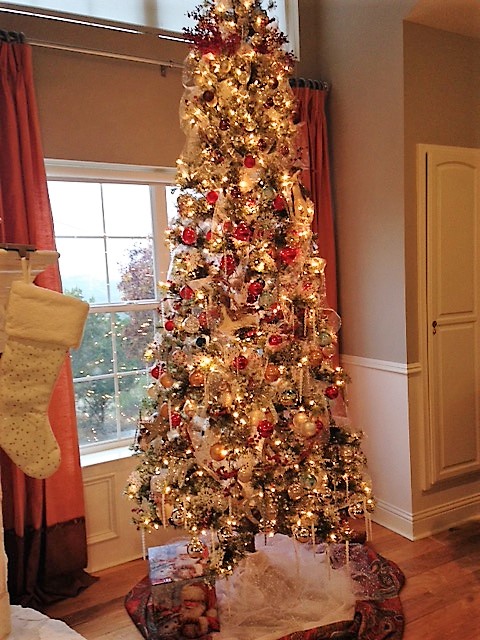
A Christmas setting from a few years ago. Because I used regular cotton quilting fabric, I needed 9 yards.
My biggest problem is that my table is too large to use commercial tablecloths. I just can't find any big enough!
Fortunately, it is pretty easy to make my own.
I like to find upholstery and drapery fabric when I can (on sale of course!).  It is 60" wide and comes in pretty colors and patterns.
I buy 6 yards (sometimes 7, if I need to match a design) and sew two 3 yard pieces together down the center.
Match up designs as well as you can.
(this is why you may need extra when there are large designs involved)
Fold in half and find the center. Attach a string to a pin and attach the pin to the center. (I use a non-stretchy cotton string. Yarn can stretch too much.) Attach a piece of chalk to the other end. It should end at the edge of your fabric.

Hold the chalk, pulling the string taut, and draw an arc on your fabric. Cut along the chalk line.
(I found it helpful to hold everything in place with a chair leg!)
If your fabric is thin enough, you can turn your hem. The fabric above was way too thick to turn, so I used an overcast stitch (shown below) to finish the edge. (A serger would work great here.)

That's all there is to it! I steamed the seams flat afterwards.
Most upholstery and drapery fabric has been treated to resist stains and sometimes water, so I will just spot clean it.
The next time you see this cloth, it will have pretty dishes and a centerpiece!
Here are some of my tables from the past.


Fresh flowers always look good! This cloth is from drapery fabric.

(see the flying birds I suspended over the table?)

I also decorate my buffet area!
Easter table. I didn't get a photo of it with flatware and napkins!
   
  
(Well, the last one is not officially a table setting, but the centerpiece is pretty sweet! This is why I always keep a cheap plastic tablecloth to throw over my tables after setting them! I certainly don't want cat hairs on my plates!) I pull it off just before guests arrive!

Monday, December 5, 2016

Christmas Tour 2016


"From north or south, east or west, with friends and family we've been blessed!"
I've started preparing for Christmas meals with family and friends! I am using my souvenir travel plates, but don't worry, I have clear glass plates to put over them for actually eating on.

The vintage map centerpiece goes well with the souvenir plates!
                                          I used a piece of "vintage map" fabric by Tim Holtz for the center of my table. 
There were only 1 1/3 yards available, so I made a larger tablecloth of cream paisley. 
The house was a cardboard form bought a year ago on clearance after Halloween. I pulled off the bats and covered it with pages from an old atlas. There is a plant stand under the fabric to raise the house.. The snow on the roof is vintage "cotton batting snow", complete with glitter. The stars are from the same old atlas as the covering for the house.

 I included a Fitz and Floyd Santa that miraculously survived the fire! (I guess if Santa can go down a chimney, a house fire can't hurt him!)
To get an idea of scale,  the table is 90" across. We will pull up chairs for each of the 12 place settings.

 The living room with the dining room in the background. We have a very open concept area.
I like little vignettes around the room so that your eyes have places to stop. This is simply a couple of vintage figurines, both pulling a cart, filled with candy canes. To tie it in, I put large candy canes in the flower arrangement between them.
The fireplace is kept simple with three carved Santas on an upturned shallow galvanized bucket and a small tree in the larger one. 
 The tree sits beside the fireplace, so that is really all the decoration it needed. 

I've dressed up the throw pillows on my sectional with simple ribbons tied like a package. They also make a great addition to an accent chair. (Check out the sectionals in this link!)
I love the easy care of my leather furniture! I can dress it up or dress it down, depending on my mood!

I removed the regular centerpiece and replaced it with a collection of nativity scenes, all hand made in Mexico and Peru. I placed two of them on the "holey" rocks we have outside.
The kitchen area 
(Behind the old screen door is my "Butler's Kitchen" which I LOVE!! It's where I get messy!)

The kitchen island, visible from the living area, has a large mirrored tray on it filled with snow globes and live flowering plants. I've covered the hand oiled red cedar top with a clear vinyl cover in preparation for the 13 children who will be here for Christmas Eve brunch! (All my sister's grandchildren. My two will not be here this year.)
 Snowmen dance on my window ledge in the kitchen along with a card from family the reads, "When life gives you snow, make a snowman!"
I have overloaded you with photos, so I'll save the bedrooms and downstairs for next time.
In the meantime, get some inspiration at the Home for the Holidays pages at Arhaus Furniture Pinterest Pages. 
See you next time!
Linda 


post signature

Wednesday, August 7, 2013

Ho Ho Ho and Beary Christmas!!

"Beary Christmas!" and Welcome to the Ho Ho Ho Blog Hop! Today I want to show you some things I made for this hop that I think will work nicely for a cookie swap or maybe a children's Christmas party. The bear family was the first thing I made for the hop. I used the book, Sue Dolman's Book of Animal Toys.
Instead of fur, I used tan fleece for my bears.


I made a burlap and gingham bunting to put in the window area of my breakfast nook. 


 Then I made a burlap tablecloth for my 4' x 8' breakfast table. I used flat felled seams along two sides to widen it and sewed a gingham binding on the edges. (Whew! I hand sewed it after turning it to the back. Not easy on burlap! It "saws" your thread in half as you sew.)

I used a wreath and a few Christmas items to add to my setting....


...and added some wide gingham ribbon to the center of the table for extra color. My burlap had a nice Christmas pattern stamped on it, but I wanted more of the red.

Because I want to use this table as a serving table, I also made placemats and cutlery bags for my guests, who would be sitting in the dining room.
The front of the placemat is burlap with a gingham binding. I made the cutlery bags of burlap and fringed the tops. A gingham ribbon ties at the top to keep the cutlery in. (I tucked a candy cane under the ribbon.) The little stuffed bear is attached with hook and loop tape and can be removed. The cloth dinner napkin is looped through the bear's arms and is buttoned to itself to hold it on. It is large enough that a child can leave it attached and still put it in his lap. (This was my own design. We have a LOT of nieces and nephews in the family who would enjoy this and I thought they were cute with the stuffed bears!)


At the last minute I decided to hang my Who's Been Eating My Porridge? (Goldilocks) quilt over one window to give more of the Three Bears feel. (You can't see very well, but three bears peek down at her from the top of the quilt.)
So I'm set for a really fun Christmas party! For this hop I made the bunting, the tablecloth, placemats, cutlery bags, and the stuffed bear family. 
Thanks to Mdm. Samm and Carol for this inspiring blog hop. Many of us are now ready to face the holidays a little more prepared! 


Be sure to join my fellow ho ho ho'ers today to see what they've prepared for you! You're bound to come away with an idea of something you could do for the holidays!

August 8


                                             Just Sew Quilter 
I do have a giveaway! I will use the Random Number Generator to choose a winner to receive a PDF copy of the Goldilocks pattern above. (If you wish, you can choose a different pattern from my Craftsy shop and I will send it to you through email.) Leave a comment for a chance to win! I'll announce the winner after the blog hop is over. Thanks for joining me today!


Related Posts Plugin for WordPress, Blogger...