I started out with a variation of the Road to California block. (A hint about where I'm going!) If you want this block in particular, you can find directions here: http://www.blockcentral.com/bom2009-2.shtml
 | |
| 1. Start with a finished block. Mine is a 10" block, but any size will work. The bigger the block, the bigger the bag! Layer it with batting and backing. Quilt it and bind it. |

 | |||
| 2. Bring three corners up to the middle. I chose to bring the yellow corners to the center for balance. Try different corners to find which is best on your block. |
 |
| 3.Sew the sides of these corners together. It is helpful to turn it inside out to do this. You will have only two seams. |
 |
| 4. Using the same binding (that you bound the block with) turn the raw edges to the center and press. The length will depend on how much strap you want. Mine is 24", but you may want yours longer. Try it out first! |
 |
| 5. Fold the binding in half with the raw edges inside and press. Sew along each side. This forms your strap. |
 | ||||
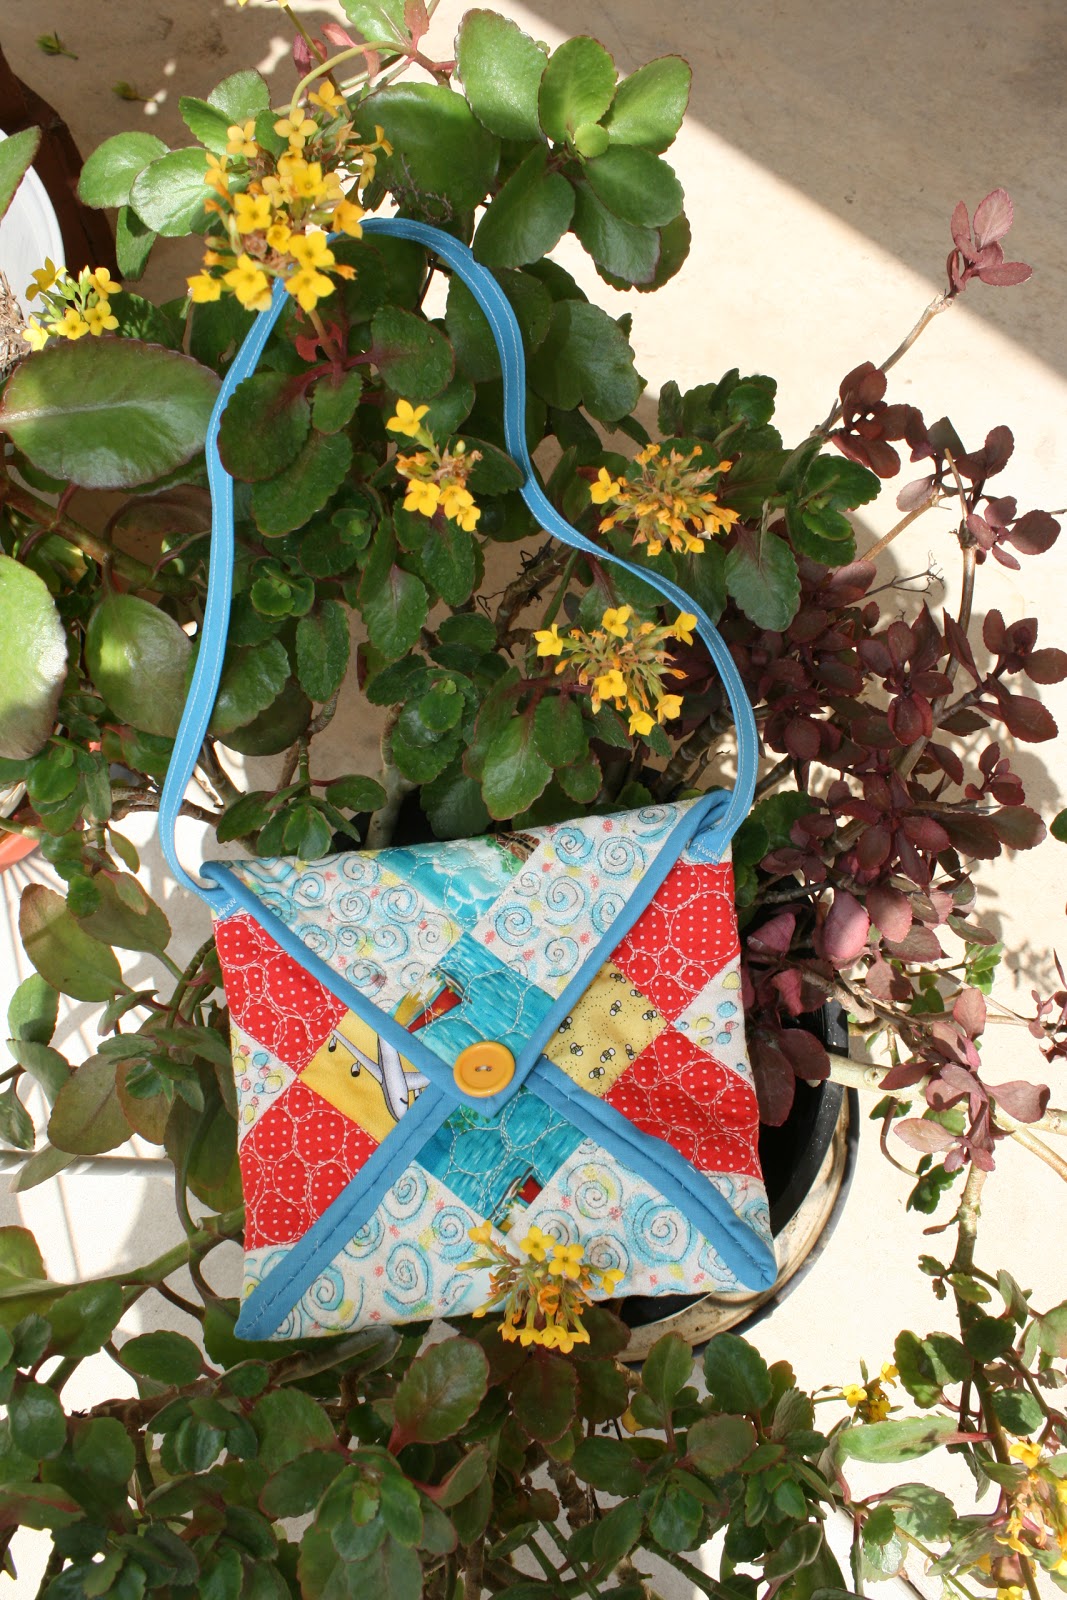
| 6. Fold under each end of the strap about 1/4" and sew to the top at each side of the bag. I sewed it about 1" below the top because I have the flap overlapping about 1" at the closure. Sew hook and loop tape (or snap, magnetic closure, button, etc.) just below the "junction" of the three corners that you have sewn together. Sew the corresponding hook and loop (or other method) to the top flap. I chose to sew a button on the front of the flap for color. |
Have a wonderful Easter
and I'll be back soon!
What a cute idea! Sure makes me wish I had granddaughters, young nieces, friends with little girls - but, alas, only little boys in my little circle. Have fun in my state of CA!
ReplyDeleteSo cute! I think my neices' little girls would love these. I also love that spring is finally here and we can start taking pictures of things with flowers instead of sticks. Thanks for posting.
ReplyDeleteIt is really cute. Such a simple idea that works so well! You are so smart!
ReplyDeleteI love it Linda, what a great way to use an orphan block.
ReplyDeleteThat's so cute! What a great idea! Thanks for sharing and showing us how to do it!
ReplyDeleteThat is the sweetest idea for a left over block, clever lady...
ReplyDeleteLinda, What a WONDERFUL idea! I have so many orphan 12" blocks and I think these would make wonderful bags to carry small stitchery projects along with you, as well as delightful little bags as a gift for my grand daughter. I always amazes me to see ideas like this. There they are, all size blocks sitting everywhere in our sewing rooms just waiting for our light bulbs to come on, LOL. I was just thinking, I could sew four of the 12" blocks together (or any size) and make a nice large tote also. I'm so glad I dropped in today. I've been down the last few days with a flare up of my Scleroderma but today is definitely a sewing day. I was going trace some stitchery projects but I think I will try a couple of ideas for this delightful bag. Thank you so much! One thing I have found, is that if I miss one day of your blog, I miss out on some beautiful projects, tutorials and "WOW" ideas. Big Hugs....
ReplyDeleteI was just thinking about making it larger! :) This bag is an adorable idea and I have a ton of blocks all ready! :) I don't want to make it to big because of my back, but would like it to be big enough to use for my purse and Kindle. Oh! And how could I forget a nice spot for a water bottle! :D
Deletetoo cute... wish i had a little one to make it for...would be a great & simple project for our quilt guild....
ReplyDeletetres tres beau merci mis tin lien sur mon blog bisessssssssssssssss
ReplyDeletewow...what a difference a few months makes...you and I as of this moment, are even...133.
ReplyDeleteCongratulations ! You have earned it!
I love this! So cute and a great tutorial! Thanks for sharing!
ReplyDeleteFun to see queues of people options to treat DL Envelopes . Here are mine:
ReplyDelete"Having the right to do something, do not do the right thing to do."
how can i print the pattern without printing all of the comments with it?
ReplyDeleteI love it, I'm going to make one for my mom, to keep her dimes in for a game they play at the retirement facility she lives at.
ReplyDeleteLove it
How adorable is that?? And such a clever idea! It could have so many uses. I have lots of leftover blocks to try this out on!! I have a Road To California quilt top that my great grandmother pieced back in the very early 1900's! Someday, I am going to 'finish' it!
ReplyDeleteWhat a great bag and so original. I am going to try making it today...
ReplyDeleteWhat a difference you make..how can i print it to use for Gift Card envelopes.
ReplyDeletewell...that's an interesting comment from anonymous for sure!!!! wanted to tell you i just made six of these for my girlie girls and their mommas. such a great way to use some of those orphan blocks! thanks so much.
ReplyDeleteI have not gone back to these old posts to delete all the anonymous comments made by spammers. It has become quite a problem in the blogging world. I wonder if they really think we will go to their sites or something? I have started moderating the comments so I can delete them before they publish. Thank you so much for calling my attention to it!
DeleteHi Linda,
ReplyDeleteJust to let you know, I pinned this tutorial. Thanks, Donna
Fin väska.
ReplyDeleteGLAD PÅSK!
I am a retired, now widow of a military man. we had summer garden parties were we wives would gather for an afternoon, to chat and make friends, get support, all that. this would be such a nice bag for one of those. also when they do a fund raising raffle, to donate one or more, so many of the younger women don't sew anymore. and are afraid to try like- we all started to sew from the start as expert and never made a mistake!! how funny. this would also make a great learn to sew/quilt project. I have learned that if you show them how, and they are able to do and finish fast ,it makes it easier to start another larger project and then the idea of sewing is not so scary anymore.
ReplyDeleteWhat a perfect idea to use a scrap block. Now I will have to be sure to make extra blocks so I can have a "scrap block" for a purse.
ReplyDeleteHello! Nice post! Thanks for distribution. I advance pedicure Diamond Beauty salon. Good luck with that.
ReplyDelete