Buzzings from a quilter who bumbles her way through life!
Showing posts with label scraps. Show all posts

Monday, September 30, 2013

Simple "Rag Striped" Throw Pillow Tutorial

 
Do you want a simple project that will use up scraps , make up quickly, and add a punch of color to your decor? How about a throw pillow made of fabric strips sewn to a fabric base? You can use any color you want! You can also make it any size you want!


Start out by cutting a fabric base the size you want your pillow to be.The base will show between the strips after you fringe your raw edges, so use something that will look good with the fabrics you choose. I actually used a lightweight canvas for mine, but quilting cotton works too. You will need 2 pieces - one for the front and one for the back.
It doesn't have to be square. Rectangles work just fine.  Pull out the strips you want from your scrap pile. They can be different widths or the same, whichever you want. Use a glue stick to stick them in place. Glue them all down, sides touching, before you sew. 

After gluing all the strips down, you're ready to sew. 
Sew each strip down 1/4" from each edge. 
 Trim the edges.
 
Place your backing right sides together with the top.
Sew around all sides, leaving an opening in one side for stuffing.
Wash and dry to fringe the raw edges. This will produce a lot of stray threads. You can also choose to use a chenille brush to fringe the edges instead of washing.
Turn right sides out, push out the corners, and press if necessary. If pressing flattens your strips, just dampen them and fluff them up with your fingers.
Stuff with polyester fibers, stuffing corners first and then the remainder of the pillow. Sew the opening closed.
That's it! You're finished! You don't have to use different colors. You can use all one color or alternate between two colors. I used a "jelly roll" and cut the strips into narrower strips.
This can be a lot of fun! I think it could be fun for a grandchild. Hmmm........maybe a future project for a bedroom? 
Until next time....
 

Wait! Did you hear about the $250 giveaway? Go to the Sew and Show button on my sidebar and leave a comment on that post to win!

Friday, February 15, 2013

A 3-Hour Quilt and Another Free E-Book!

 
McCalls has again inspired me with their free e-Book, Modern Quilt Patterns. The quilt you see above is one I made from this little e-book and is called Lemon Squeezy. (The one in the book is much prettier, but I used strips of scraps I had in my scrap bin.) I made this quilt in 3 hours from start to finish! (Most of my strips were leftovers and already cut.)
Sugarplum was fascinated with this quilt. She thought it was hers!
Your quilting is done as you sew, so after sewing all the strips, all you have to do is square up and bind! Need a quick crib quilt? This is a good candidate!
This little book is only 10 pages long, but the three patterns inside will inspire you with the spring colors and easy, modern designs - Baubles and Beads (a modern square within a square design), Rainbow Rhythm (a contemporary take on half square triangles) and Lemon Squeezy (the quilt as you go strip quilt).
Here is where you can get your free download! Give it a try! You have nothing to lose!
  Until next time..... Bee Blessed!
 

Thursday, February 7, 2013

Herringbone Scrap Quilt Tutorial

 
 I have a LOT of scraps that I would like to use this year. I have been trying out different fast and easy methods of using them in my quilts. One very easy method is the "Herringbone" quilt. This is a very old and very easy method. Best of all, you can custom cut your strips to fit the size scraps you have. Both of the quilts above were made using this simple method.
First you need to cut your strips to the same width and length. The batik quilt above used a purchased set of batik strips similar to a "Jelly Roll". The strips were 2 1/2" wide x 42". I cut them into 10 1/2" lengths and left the width the same. The quilt on the right used scraps that I cut to 1 1/2" x 5". (A pleasing size seems to be the a width you choose and the length ABOUT 4 or 5 x that width. So a 3" width might have a length that is somewhere between 12" and 15".  This is not a hard and fast rule. Experiment with what you have!)
Here is the way to start:
 
 Sort your strips into colors. Pull from each stack as you go. You can either leave it very random as in the quilt on the right, or planned as the quilt on the left. 
Place two strips right sides together as shown above. Sew across the end as shown. The first set will be a short seam. 
Finger press the seam toward the point.  
 The next strip will go across the intersection of the previous two strips, as shown. Press the seam toward the point.
 The next strip goes across the new intersection and along the second strip you added.
 This is what you will have so far. The next strip will go along the orange/blue strip. Just remember that you will always be sewing across the end of the last strip and the length of the previous one.(Note the next strip will be sewn to the orange/blue side and not the all orange side in the photo.)
 Keep going like this. You will find that when you get going, it will be very fast and easy! Keep finger pressing the seams to the point.
Lay out your strips to see the arrangement you like. If you want an arrangement like the one above, you will have to sew some strips in reverse. (Where you started with blue and then added red, on the next strip start with red and add blue. It will make sense when you see it.) If you are making a random arrangement, you don't have to change anything.) Make the rows as long as you want. Instead of just holding them up to see if they are long enough, count the strips along the edge.
NOW PLEASE TAKE NOTE: You have edges now that are bias. Handle the strips gently and sew a "stay stitch" along the edge to stabilize it before sewing the strips together. Also, it is helpful to not cut the points off the edge until after you've sewn the row together.  I didn't do either of these things in the batik quilt and had some distortion because of it.
Another thing to take note of is to match up the seams along the edges of the rows you are sewing together so that the rows match up. 
   On the smaller quilt, I chose to sew a strip between the rows. (I also stay stitched before sewing to keep my bias edges from distorting!)
  You could alternatively choose to cut your strips into blocks.
 Start saving those strips you have left over from borders and sashing. You might even want to start cutting scraps into strips and stashing them together until you have enough for a quilt. 
Have fun! Until next time....
Bee Blessed!
 

Monday, December 10, 2012

A Free Log Cabin E-Book!

 Do you have scraps? How about a fabric that you've been keeping in your stash without a plan in mind?  Now you can get a free e-book from Fons and Porter that will inspire you to use those fabrics to make something!
  This morning I received a copy to review. The title is "Build Your Best Log Cabin". Although this block has been around since the 1860's, it has remained a popular choice over the years.

This book gives detailed instructions, a chart of strip widths and block sizes, and several stunning contemporary quilts made from this simple block. I think you'll be surprised at how "modern" this old block can look! Do you like chevrons? You'll find an easy way to make a chevron quilt here. Or, you can make something very traditional!
Many of us are trying to use up some of those scraps that are taking up valuable real estate in our sewing rooms. This block is perfect for that! The four blocks here were made just this afternoon using a bundle of fat quarters I won during a shop hop several years ago. 

The focus fabric, "Love Is" by Nancy Halvorsen, Benartex, had squares (actually rectangles) that I used for the center of my log cabin blocks. Although I haven't sewn them together yet, I am on my way to having a quilt that until this morning was just a stack of fabric and scraps on my shelf.

I made the traditional blocks using the directions in the ebook, which were easy to follow. (I cheated just a little and used a larger center square.) 

The book gives 6 very simple steps for making your blocks in a fool proof way!
There are some stunning examples in this book from Ricky Tims, Marti Michell, Shon McMain, and Lori Christianson. 
In true Fons and Porter style, there is a LOT packed into 24 pages. Among the pages are little boxes with tips and techniques that make your quilting easier. You'll find directions for binding with piping, joining your binding the "lump free" way, and sewing with heavy thread in your bobbin.  Projects range from easy to challenging.
You can get your book here!
Did I mention that it's free?
 Sew we quilt
Don't forget about the In Your Words blog hop coming up January 7 - 16th. It promises to be a lot of fun!
Until next time.....
Bee Blessed! 

Thursday, October 11, 2012

Tutorial for the Don't Leaf Me Alone block

I promised you a tutorial for my "Don't Leaf Me Alone" block.
My block, shown above, is a simple leaf using lots of small scraps! I thought it up one night when I couldn't sleep and to my amazement, it worked with very little tweaking. I love it when that happens! It is a combination of paper piecing and freezer paper applique, and although I appliqued by hand, you can use your machine to sew it down if you wish. Don't be scared away.....it REALLY is simple, despite the number of steps I've shown. I just wanted to be sure you knew EXACTLY what to do!
1. Fold one sheet of 8 1/2" x 11" paper with a piece of freezer paper. On the fold, draw concentric lines as shown above.

2. Cut on the lines with the paper still folded. When you open it up, you should have shapes similar to the ones above. You will need to repeat this for each leaf you make.


3. Lay a scrap right side up on one point of the bigger plain paper shape. The freezer paper will be used later.
4. Lay another scrap right sides TOGETHER at the edge of the first scrap.
5. Sew 1/4" through all layers including paper at the edge of the two pieces.
6. Turn and press.


7. Continue all the way around to the top. Be sure your pieces overhang each side of the paper by at least 1/4". Starting back at the bottom point, do the exact same thing going up the other side.
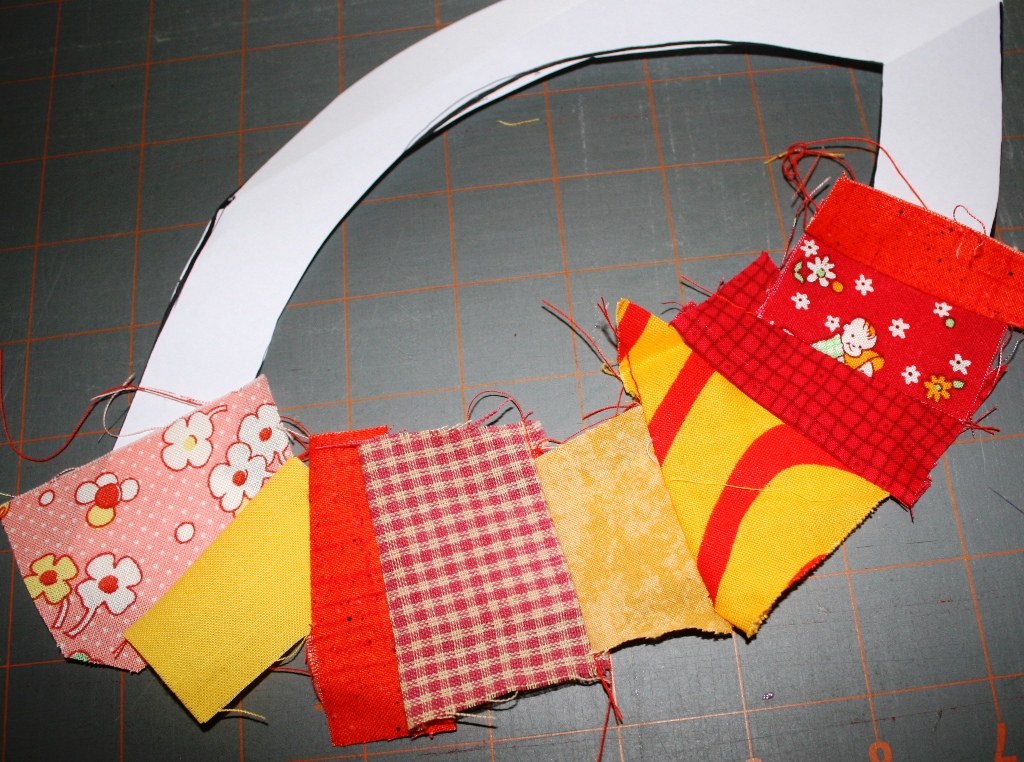
8. When you get to the point at the top, clip through the paper so you can sew the two fabrics together. (You can see I just used scrap paper for this!)
9. Put the two fabrics at the top right sides together and sew a seam just where the paper comes together. (You can feel where the stiff paper is and that will help you judge where to sew.)
10. Trim the fabric that overhangs the outside of the shape to about 1/4". (top photo) You will later turn this under, so be sure you have enough to easily turn. Iron the freezer paper shape (the one that matches) to the FRONT. (lower photo)
11. Carefully pull the paper off the back. (I did trim these seams at this point, but that would have been easier to do as I sewed. Live and Learn!)
12. Use a glue stick to turn the seam allowance around the outer edge to the wrong side. Press. Leave the seam allowance in the center as is.
13. After pressing, pull off the freezer paper.
14. Repeat the above steps for the second leaf shape. After turning the edges, use the glue stick to position it in the center of the larger leaf shape. You will applique this down either by hand or machine.
Add caption

15. For the last shape, you will not be piecing. Iron the freezer paper to the FRONT of the fabric you have chosen. Trim around the edge 1/4". Run a line of the glue stick on the WRONG side of the seam allowance and turn the seam to the back. Press. 
16. Use the glue stick to position this shape to the center of your leaf. You are now ready to applique it down.
17. From freezer paper, but a branch and vein design similar to the one above. Use the same method of ironing, trimming, gluing the seam allowance to the back, pressing as in step 15.
 18. Use the glue stick to position the veins where you want them. Applique the entire piece to your block. 

That's all there is to it! I think this could be really pretty as blocks in a larger quilt. 
Remember to check back on Monday to see who won the giveaway! 
Until next time.....
post signature
Related Posts Plugin for WordPress, Blogger...