Buzzings from a quilter who bumbles her way through life!

Thursday, September 27, 2012

Let the Sun Shine In!

I teach 2 year olds at church. After years of teaching elementary aged children, its not easy for me to come up with activities that can be appropriate for a toddler. 
Our lesson was on "God made the sun, moon, and stars." Simple, right? 
Well, nothing is really simple when it comes to 2 year olds......
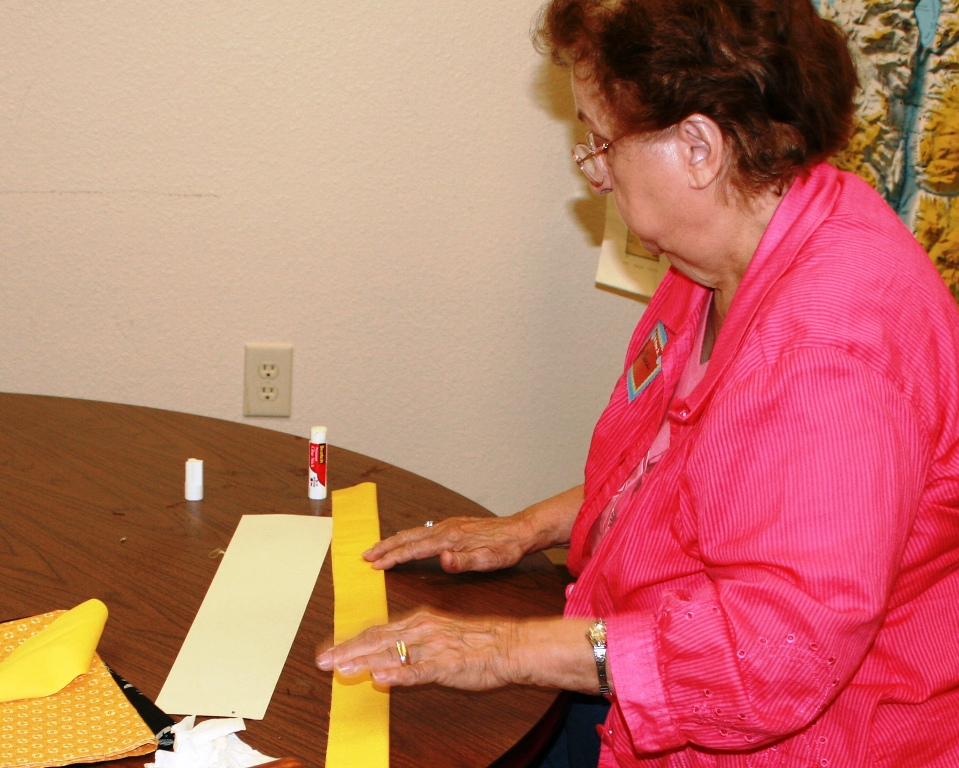
.... but we gave it a good try. We let the children color on the back of the pillow and then we quickly stuffed them and sewed the small opening closed. Judging from how they held on to their little sun pillows when finished, I think it was successful. You might want to try this with your little ones.

 1. Trace off a circle onto the wrong side of a piece of canvas or muslin. Let your pencil lines show and use these as a sewing guide. Trim about 1/4" outside the line.


2. Pin loops of ribbon (I cut mine 4" long) around the edges on the right side of the canvas. Sew around the edge to secure them. Remove the pins.


3. Place right sides together down on a print fabric that you have chosen to be the back of your pillow. Sew around the pillow on your pencil line but leave about 2" open for turning.


4. Turn right side out and press. I made 6 of these in about an hour and had them ready for class. (I took an iron, some stuffing, and a needle and thread. I have two helpers, so we all pitched in!)


 Let the children scribble on the canvas side. Encourage them to put a LOT of color on it.
Be sure your crayons are the regular type and not the washable ones. Heat set with an iron before stuffing. (Put a paper towel between the iron and the fabric!


This was such a simple project, you might want to try it too!
Older children could make one for a new baby in the family. They could use fabric markers instead of crayons for a brighter color. 
How about using flower colors and calling it a flower instead of a sun? That would work! 
Have fun!
.....until next time......  post signature

Monday, September 24, 2012

Fall Leaves from Felt and Scraps, tutorial

Fall is in the air! 
Unfortunately, here in South Texas we don't have the beautiful change of colors that you see elsewhere. Our live oaks stay green all year and deciduous trees go from green to brown to bare seemingly overnight - usually in December! 
I love fall colors, so I used some felt and fabric scraps to make my own!

These would be fun to make with children and are the fabric version of the crayola shavings in waxed paper that many of us made as kids.
                                       
First you need a leaf shape. I just drew on off, but you can trace actual leaves to get a nice shape. I think maple leaves would be perfect for this! Find some felt that is big enough for your pattern. I used two colors for this one. Cut out your outline, going through both layers.
Here is a more simple shape. Cut the center out of your leaf shapes. Notice above that I chose to use this same opening shape even in the oak leaf.
This is a little difficult to see, but I have two pieces of fine netting here. I've clipped little bits of fabric onto the center of one piece, covered it with the other piece, and then free motion quilted all over it to hold it together.  Be sure it is as large as the center opening in your leaves.
Here is one where I used larger bits of fabric and then straight stitched them together. (I also have a couple of leaves made with the fine plastic netting from a bag of oranges. I used tacky glue to hold sequins inside it. Lace might be pretty! Use your imagination! Lay it over the opening in the felt.
                      Place the second felt piece on top.
      Sew around the opening to hold the netting inside the    leaf. Then sew around the outer edge.
Here is one finished leaf.
And another.
Here are some as the tassel on a wall hanging.
Hanging in front of a window.
Hanging from a wreath.
  Watch for October 8, my day in the Leafs Me Happy Blog Hop, when I will share a really pretty, contemporary block with you! You can click on the button on my sidebar for more information! I'll be "talking to you" before then, but keep it in mind. There will be a LOT of inspiration for you during the hop. It begins October 1. (There will be prizes!)
So...until next time...
post signature
P.S. - My friend, Jane, of Projects by Jane, is having a giveaway for her 5th anniversary celebration. Go check her out!

Monday, September 17, 2012

Sewing for Charity

I don't have a quilt to show, although I am working on one, and I have been sewing! 
This weekend a group of 23 ladies met to sew for charity. We have a specific need to fill and we did our best to meet that need. We will meet again in a few weeks to continue. 
We asked for fabric donations from people's stashes. That meant lots of different types of fabrics in all colors. We had drapery fabric, cotton, canvas, you name it!


These ladies spent the day cutting and coordinating the fabric. (We needed some for the body of the tote and some for the pockets and straps.


Since not everyone knew how to sew and some didn't bring a sewing machine, some folded pieces .....


....and some pressed, getting everything ready so that sewing was quick and easy!


Others sewed....some on their trusty Featherweights (we had 3 of them humming) and some on their fancier machines! All the bags turned out just fine!
 

We even recruited a bell ringer to ring out an alert every time a tote was finished.  He did a great job! (Everyone had something they could do!)
The organizer behind this effort was my sister, the one in the middle! (I'm behind the camera, so I'm not in any of these, but I did work!)We laughed, we learned, and we bonded with each other. What a wonderful day!
Here are about 30 of the totes we finished. They are needing 200, but another group is also working on this. Hopefully, we will work faster next time since we will have worked out the kinks and everyone knows now how to do it!
 Being women, we had to stand back and decide which we liked best. These will be going to an orphanage in Ukraine. 
So.......no tutorial today, but I have been busy!
(Later we may be making pajamas for the orphans, as well as little quilts and blankets.)
 Whatever you choose to do with your talents, I hope you consider using them at times to help others. There are all kinds of opportunities out there - for babies, battered women shelters, homeless, sick, and sometimes you have opportunities where you worship. Keep those stitches going and....... 

post signature

Monday, September 10, 2012

Hanger Covers for Easier Mornings!


When I was a little girl, "panties of the week" were all the rage. You could have a pair for each day and the day was embroidered right there on them! I guess this was a way to be sure little girls didn't wear the same panties every day or something!  I used this same idea for hangers. I had planned (before my last minute trip to California) to make one for each school day of the week. The idea is that you can help your kids pick out their school clothes for the week and have them already coordinated and hanging for each day! I'm really into anything that helps make school day mornings easier! (When my boys were school age, I was teaching. That meant that I was getting ready the same time they were. Anything I could do ahead of time made the mornings flow more easily!) The little clothespins hanging down are for the pants, shorts, or skirts that go with the top. Well, I just got back from my trip and I am going to go ahead and post this without Tuesday, Wednesday, Thursday, and Friday! Of course, they don't have to have days of the week on them. How about cute embroidery? OR just use your favorite fabrics!
1. Trace around the hanger you plan to use. Hangers can be a little different in size. If your hanger is really thick, add a little to the pattern to account for the thickness. Cut out your pattern.

2. Layer two layers of your fabric, right sides together, and beneath that put two layers of batting. Yes, batting on the bottom, fabric on top! Trace your pattern onto the top layer of fabric.
3. At the top, where the hook of the hanger goes, square up the end. You will be turning this under and topstitching it. I found later that if I had made the one above just a little wider, it would have been easier to turn under, but I made it work!
4. At the side bottom of the hanger, make a line straight down about an inch past the bottom of the hanger. You will be leaving the bottom of the cover open.
5. Before cutting out, sew your cover together.
6. Trim the seam to 1/8" and snip the corners at the top of the hanger.
7. Turn the TOP fabric right side out. You should end up with the batting on the inside and the fabric with right sides showing.
8. Trim the bottom so that it is even.
9.Turn under and top stitch the top and bottom of the cover.
10. Slip over the hanger to be sure it fits.
11. If you are adding embroidery, this is time to do that.
12. To add the clothespins, put a ribbon through the eye in the top of the spring and tie it to the top of the hanger. If your hanger does not have a little inset at the top, you might need to attach it to the inside of the cover instead.

 So here it is! Ready to hang in the closet and provide a chance for a little more calm on school mornings. I can see how a set of these could be a fun gift and could be made of really cute fabrics. 
So what do you think? Would this help out anyone you know? They don't have to be school children. I know some grown-ups who might benefit from a little organization like this! 
Until next time.......

post signature
Related Posts Plugin for WordPress, Blogger...