
Most of us grew up with the standard of pin cushions - the tomato! I have an entire collection of pin cushions of all shapes and sizes, but when I think "pin cushion", this is the image that comes to mind. The problem with any pin cushion is that it is not practical for carrying to class. The pins crush down into the cushion or get caught on things. You might even find one in your finger if you reach into your tote to pull something out!

In about 5 to 15 minutes, you can have a pin cushion that will protect pins, needles, and even thread.


3. If you want a thread holder in the center, snap off a plastic stir stick or a skewer to about 3" long (test it by trying to put the cover on) and pushing it into the center. Remove it. (You needed the hole to make finding the center easier later.) Cover the top of the styrofoam with a circle of batting if you want to make it smoother.

4. Cut a circle of felt a little larger than the styrofoam. Tuck it in all around using a butter knife.
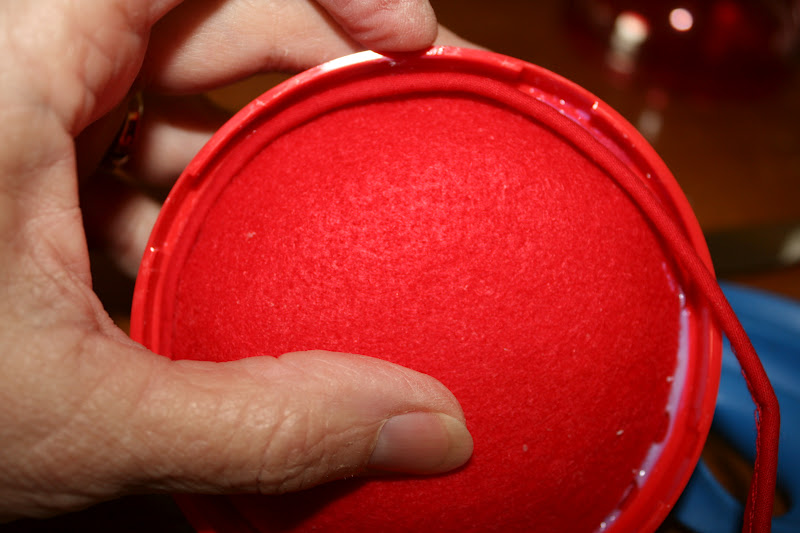


7. Cut a little piece of green felt like the top of the tomato and make a snip in the center of it. Put the stirrer through the snip. Put glue in the hole and push the stirrer into the hole. Put a little glue under the green to hold it in place. Let the glue dry, but before that, be sure your lid will screw closed.

Put your pins in and screw on the lid. That's all there is to it! Now it is safe to carry around in your tote bag. It will hold a LOT of pins, too!
Wouldn't this be a fun little gift?
(Note: I use small spools of silk thread for my applique and they fit perfectly on the little thread holder. Large spools will not fit.)
Of course, it has not escaped my attention that you could just plop your old tomato pin cushion in the tomato keeper to put it in your tote, but what fun is that? This is much nicer I think!
Great idea Linda! I always get stuck with needles which pokes through my pin cushion and then my bag when I'm out and about with my sewing. Not fun at all. If I ever find something like your tomato, I will give this a try.
ReplyDeleteWhen I do hand work o the go I use a bobbin! I LOVE this idea! Yup gonna copy ya! maybe I will have to go to the store today!! LOL!!
ReplyDeleteLinda you are so clever,what a great idea,well done.xx
ReplyDeleteWell, isn't that the cutest thing! What a great idea, thanks for sharing!
ReplyDeletePretty darn clever!! Stand up and take a bow!
ReplyDeleteWhat a great idea! I don't think I've ever seen a tomato holder like yours in the UK though!
ReplyDeleteI am LOL right now - I thought the same thing, I just did not act on it. Saw the tomato container recently and thought it would make a wonderful traveling container for sewing - I sure never have a tomato left over - but bought the onion keeper instead, which has a flat side - I am now going back for the tomato. Thanks for sharing this wonderful and needful thing. Judy C
ReplyDeleteThis is the greatest idea! Thanks so much for sharing it with all of us.
ReplyDeleteThat is the cutest thing ever! I've not seen these keepers but I'll be looking! Great tutorial
ReplyDeleteBlessings
Gmama Jane
A lovely pin cushion Linda. So cute!
ReplyDeleteThis is such a super idea! I hafta go and look for one of these! LOL
ReplyDeleteWhat a good idea, Linda.
ReplyDeletesuper cute idea! Thanks for sharing.
ReplyDelete