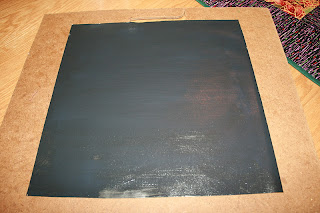
I promised you a tutorial on making a chalkboard tablecloth similar to the one I made using Ghastlies fabric. That cloth was made for a round table, but I'm going to show you the basic process here in a square. This is made for a doll's table but the process is the same. Just measure your table and use those dimensions for the chalkboard portion of your cloth.
 |
| Here is the can, but it came packaged in a box. |
 |
| Paint the surface, keeping your brush strokes as smooth as possible. |
 |
| When your surface is completely dry, you can "prime" your chalkboard by covering it with chalk using the side of your stick of chalk. NOTE: you can do this after you sew on the borders if you wish. |
 |
| Sew borders on two opposite sides of the center. You can sew through this very easily! |
 |
| After pressing them open (YES, you can press this! Just in case your fabric is different from mine, proceed with caution at first.) Sew the remaining two borders on. Press. |
 | ||||
| Now sew your outer borders in the same way. |
 |
| After turning under the edges and sewing a narrow hem, you are finished! Have fun with your tablecloth - play hangman with your children..... |
 |
| ....leave notes for your family..... |
 |
| or use it at a party! |


Wild! I have painted a chalkboard before but would have never thought to use it on fabric. Wowza.
ReplyDeleteI have been waiting for this and am so glad to see the clear instructions. How does this wash up? I have kids and can foresee that they will be spilling and making messes.
ReplyDeleteThis looks like so much fun - even if it won't work for at the table when the kids are eating, there are plenty of other places.
Thank you!
What a great idea. Thanks for sharing the tutorial with us :)
ReplyDeleteThis is too cool! Very nice, and I'm sure this would be cool for little kids! The best thing about it being inside, is it's usually not too dirty or anything. Very nice!! :)
ReplyDeleteThanks for the share! I'm pinteresting it for me, thanks! Hope you don't mind. :)
Great tutorial - thanks Linda. I've pinned it on my tutorial board on Pinterest so I won't lose it. :) blessings, marlene
ReplyDeleteAhh, Miss Linda, I'll have to share this with a friend of mine, she has little ones still under foot. Thanks for the tut!
ReplyDeleteThis looks very doable. Thank you for sharing your techniques. Adorable little table cover.
ReplyDeleteWOW.....thanks Linda for sharing this great tutorial....my grandkids have a round table in their library and this would be perfect. Thanks bunches!!
ReplyDeleteOh my goodness..what fun!!!! Just image all the fun one could have at a dinner party...thank you for sharing. xoxo
ReplyDeleteWould make a great wallhanging for the grandkids' rooms. Hmmm...maybe some Christmas gifts!
ReplyDelete