Index to Pages

Thursday, July 28, 2011

My New Quilting Studio


Well, this is my new space so far. It's not really green! It is turquoise! Getting a picture pointed toward this window was challenging for me, so the lighting is not quite right.  I can't promise I won't make changes and additions in the next few weeks as I learn how to work in this room. I have reused the shelves and cabinets from my old room, but because it is more visible from the main living area, I put most of my fabric in plastic tubs for a neater look. (It wouldn't all fit, and since I couldn't find tubs to fit between the narrower shelf above the other tubs, I have some folded fabric there. 
 
I've put my vintage button cards above the window along with my Great-Grandmother's and Grandmother's aprons. The little stool is also a vintage item. The wooden ironing board was handed down to me and was from the 1940's. 


I mounted my hardware drawers  on the wall to get them off my cabinets. They hold all my embroidery floss.The space left at the end of the cabinets was perfect for this because it didn't interfere with opening the closet doors. The little step stool is a necessity because I am only 5'2". 


      Here is a view of the room taken from the window side. The opposite side of the room is not finished yet. I have my sewing machine cabinet there, but still need a cutting table and a place for some of my office equipment. Hopefully, that will happen soon! 
So, that's my room as it is today! I can't wait to start working in it, but I have a mess now in the rest of the house that I have to clean up.  (yuck!)
post signature


Tuesday, July 26, 2011

A New Quilting Room!


 I haven't been near my computer lately because I'm in the middle of a new project - a new quilting room! (Actually, it's my old guest room, but I'm swapping out so that I have a little more space and I'm not so far from the kitchen!)
Here's a tiny sneak peak.  I'll post again in a few days to show you more of what's buzzing.
In the meantime, get prepared for a FUN 3 MONTHS of prizes in the Wantabe Quilter contest thats coming up next week! Be sure you send me your name, email, and phone number (so we can let you know when you win something wonderful!). (Send it in an email instead of posting it here! We don't want your phone number out there for just anyone, right? I promise I won't share it with anyone but Madame Samm, who also promises to not share.) You can only have one sponsor (I would like to sponsor you!) and you can't win without one! If you are already a quilter, you will comment on Tuesdays and Thursdays at Stash Manicure . If you are a Wantabe Quilter (haven't quilted and do not have supplies) you will comment on Mondays, Wednesdays, and Fridays. In your comments, mention that Linda from Buzzing and Bumbling sent you. That gives me a chance to win something if you win!  Pretty please with honey on top?
So send me your information and keep your fingers crossed! There are some great prizes being offered and someone has to win!
post signature


Monday, July 25, 2011

Wantobe Quilters!


Calling all Wantobe Quilters? 


"Hello friends and followers, I would love to welcome you
to a Wantobe Quilters Campaign over here. ( http://stashmanicure.blogspot.com)
 They are having quilting supplies to giveaway 5 x a week for 12 weeks. 
Supplies that will have you quilting
before you know it...From sewing machines to irons, to die cutters,
to mats, to rotary cutters, sewing baskets, scissors, batting, needles,
rolled sewing machine bags, patterns, books, magazines...everything
you could imagine to assist you in being a NEW Quilter. 
Even if you are already part of this community you can win
quilting stuff too...Tuesday and Thursday are days for us..
All you have to do is email  me your name and phone number 
and email address sew I can submit this to the organizer, because if you win
anything I can win something too. 
All you have to do is be my follower and a follower
That is all! There are over 49 Sponsors involved.
I am pretty excited to be part of this, sew should you.
I love being a QUILTER! 

( p.s you will not be eligible to win anything if you do not register
with a blogger where you see this message)


post signature 


Tuesday, July 19, 2011

Koozie Cutie Tutorial


 I have no idea where the word "koozie" came from, but you've all seen them and probably own some! 
This tutorial is for one you make yourself. It's a cute little quickly sewn project that dresses up that bottled water or soda can and makes it cute enough for a picnic! 


If you're suffering from the heat where you live, like a lot of the country, you know that the minute you take a cold bottle out in the hot air, you have condensation. This will soak up the extra water droplets for you and give it a little insulation.

Although I give you measurements for the one I made, you may want to measure your bottle or soda can to be sure it will fit. Just leave 1/2" extra length so you can sew 1/4" seams.
1. You will need an outer fabric, batting, and lining fabric. Cut pieces that are 4" x 9" and 2" x 3" out of each. This will be your "top" and "bottom" pieces.
2. Place lining and outer fabric right sides together with the batting on the bottom. Do this for both sets - both top and bottom.
3. For the bottom set, sew around three sides, leaving one shorter side open.
4. Turn this piece right side out.
5. Pin between the lining and outer fabric in the center along the bottom. Pin the open end to the bottom of the seam. You will catch this in the bottom seam. Sew both long sides together using a 1/4" seam. (Leave the ends open.) Turn right side out.
6. Fold in half with outer fabric inside. Sew along the open edge using a 1/4" seam.
7. Whip stitch the loose end of the bottom to the opposite side of the top. Turn right side out.
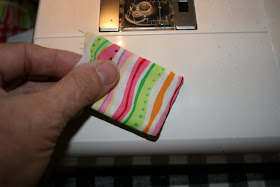
8. At this point, it is finished.......BUT, it is so much fun to embellish it!!! I sewed a little silk flower on mine. How about buttons, rick rack, embroider a name...whatever you can dream up. Make it fit the theme you want to carry out.
Use your imagination! Can you see novelty fabrics for a birthday party? How about a fabric that coordinates with your dishes? Or maybe each person can have a different fabric to help you keep everyone's bottles or cans straight.  A bottle of water with a nicely decorated koozie can become a small gift for a hospital patient or their family members. 

 
                 As always, have fun with it!


post signature


Thursday, July 14, 2011

School Supplies for Quilters!

A gift from a student many years ago. I wonder if she is a quilter today?

 In "another life" I was an elementary school teacher. Through the years I taught from Pre-Kindergarten through 5th grade. Second grade was my all time favorite, I think, although Pre-K would hold a close second, or maybe Kindergarten. Oh, well. It gets in your blood. It's not the type of profession that you can leave at work. You bring it home with you. You dream about the children. You find yourself thinking continually of newer and better ways to get a lesson across. You worry about whether or not you're the best teacher for a particular child. You worry about their home lives. You spend a good chunk of your meager pay check on classroom supplies and teaching aids (at least public school teachers do that!). Teaching is a hard, thankless job in most cases. So why do I miss parts of it so much! I go in the store when the school supplies are put out and I shop the aisles. I feel at home there. So it's no surprise I find a lot of ways to use these supplies with my quilting. Here is a little list of what I found this week:


Under $1:

Clear washable school glue (see glue resist tutorial here), glue sticks (see my applique method here),
box of 24 crayons (for planning colors or even coloring  on your quilts like women did in the 30's), pencil box (I use several for all kinds of smaller things like  beads, scissors, even for supplies for an on-the-go type project)

Under $2:
Hardcover composition books (perfect for jotting down ideas, taking quilt class notes, keeping a log of quilts). The hard cover makes it feel like a real book, plus it's more durable.  I found it in 2 sizes.

Box of 64 crayons (the more the merrier, I say!) and a clear protractor (use this not only for measuring, but the rounded side is useful for drawing out scalloped borders or scalloped quilting)
 Under $4

Frixion pens (ink disappears with the heat of an iron - I use it to mark the embroidery lines on my quilts. Doesn't matter if you stick it in a freezer and the words come back, I will have embroidered over them!!! ), Fiskars Student scissors (these are the ones made for ages 12+, not the ones for younger kids! They are only 1 1/2" shorter than a regular pair of fabric scissors. They are sharp and cost about $3.49. I bought some last year and they are still sharp. I use them for fabric all the time. My "real scissors" have gotten dull so if I am not using the rotary cutter, I am using these!)
So that's my list. You might want to keep your eyes open next time you go through the school supply aisle. You might be surprised at the goodies you can find!


post signature


Thursday, July 7, 2011

Upcycled Jeans Bag Tutorial


 This handy little upcycled bag is made from the leg of a pair of jeans. It can be as fancy or as plain as you want to make it. It has two compartments,a pocket on the inside and pockets on both sides of the outside, and a handy little space for a book, magazine,  newspaper or even umbrella. One compartment is open and the other is covered by a flap. You could add a closure of some sort - zipper, button, magnetic catch, etc. - if you wanted.

I'll show you exactly how I made this one, but remember that you can leave off pockets, change the flap, and of course, change colors. 

This all started when I "whipped up" a simple little bag out of a leftover leg from a pair of jeans that I was cutting up. 
Below is the original bag. I had so many comments on it, I decided you might want to know how it was done!


1. Fold up the leg of an old pair of jeans to find the approximate size of the finished bag. Cut above the folded up hem. Cut a lining the same size by placing the edge of the jeans leg along the fold of a piece of fabric and cutting around the other three edges leaving a seam allowance. (not shown) If your piece has a worn spot, plan to have it end up on the middle compartment of the bag or under a pocket.

2. Cut a flap from both lining and jeans fabric. You can make this any shape you want. The original had a rounded flap.

3. With right sides together, sew the flap around the outer three edges.
4. Turn, press, and topstitch the flap. Set aside.
5. Right sides together, sew the long edge of the lining together. Unless your jeans had straight legs, one end will be a little wider than the other. Hem the wider end of the lining 1/4".

6. Cut off the two back pockets, cutting through the fabric that it is sewn to. Leave a seam allowance at the top of the pocket. (You will have an intact pocket.) Cut just under the edge of the pocket.  If you want three pockets, you will either need to use another pair of jeans, or just construct a simple pocket to use on the inside instead of the presewn one.

7. Cut a 1 1/2" strip of the lining fabric and sew, right sides together, to the seam allowance at the top of the pocket.  Turn each edge in to give a clean folded edge. (This pocket trim is absolutely optional, but gives a nice finish to the pocket and an added bit of color to the bag.) Do this with all three of the pockets.
8. For an inside pocket, pin the pocket, right sides together, to the outside of the bag in the position you want it. It has the lining trim sewn to the top. That is what I am actually pinning to the bag.
9. Without turning lining inside out, slip it over the bag. (Be sure you have the hemmed edge at the bottom. Pin to the top, pinning over the pocket. Slip the flap in between the lining and bag on the opposite side, placing the lining side of the flap against the bag and the denim side against the lining (unless you prefer the denim side to show, in which case you would reverse this.) Sew a 1/4" seam around the top to attach the lining to the bag. (If, like me, you have had to rip out and resew your lining to the bag, you may have stretched your denim. In this case, just make a couple of small pleats at equidistant points on one side and call it a design statement!)

10. Turn inside out and tuck the lining inside the bag. Press. It should hang out at the bottom about 3/4". 
11. Turn the lining over the edge of the bag and sew it down all the way around.

12. Fold the bag in half (I have pinned on the pocket to see where I want it and to be sure it will fit.) Mark the center with pins. Sew through ALL layers straight across the center. This will divide your purse into two sections.
13. Cut a strap of denim. Make this a size comfortable for you. I am short. I have cut mine 3" wide and 24" long. (If you are taller than 5'2", you may want it a little longer than this!) Turn one long side in 1/4" and sew down.
14. Fold the raw edge in to just past the center. Fold the hemmed edge over to the center and sew down.
15. Insert the ends of the strap at the top of the bag between the two sections. Sew through all layers to secure. (This may be difficult on some machines. You may have to sew through on side only and then sew the sections together by hand at the edges. Close off the center section from the top by hand sewing the two sides together. (You don't want this open or you might accidentally drop your keys through it and they can fall to the ground without you knowing it!)
16. To add silk flowers, take the plastic stem and base off the flowers. Sew through all layers of the flower by hand, as on the extreme right. Then glue the plastic center back on using a thick craft glue. (You may need to cut any protrusions off flush so that it will glue well.) You could use buttons here in place of the plastic center. You could also leave off the flowers or use something different!
17. Turn the lining at the top of the pockets to the back, leaving about 1/4" of it showing. Sew the pockets to the front and back of the bag by hand. (It is very difficult to get it under the foot of the machine. If you are going to try, try it before sewing the lining on!)

That's it! I showed a lot of steps, but it is really a very simple project! You're basically lining the leg of the jeans, sewing across the middle, and adding a strap. The pockets, flap, and flowers are all just embellishment (well, the pockets are pretty functional - a great place for a cell phone or car keys!). I hope you'll give it a try! (And....I would love to see a picture of how yours turns out!)
      
post signature

Giveaway Winner!

A Winner!

 Thank you to everyone for your comments! I wish I could give each of you a prize. Wouldn't that be fun? Unfortunately, that's not practical and I'm not rich. (wish I were!) I had my husband use the Random Number Generator on the computer and the number was 25. The 25th comment was:

Patricia B Studio said...
Great tutorial. My grandchildren will be coming for the 4th of July weeks vaction. I was looking for a little special gift for them.. You have given me a great idea.. I am going to use your tutorial to create a snack and "busy" bag for for each of them.In Maine the weather changes in a moments notice we can use these bags on drives or when rainy weather hits...Thanks for the idea, off to create... If you want to check out my creations later on (possibly tomorrow) I am at http://patriciabstudio.blogspot.com/ Thanks for the tutorial and the chance to win two of your wonderful patterns. Have a great day and Sew On...  
She has a nice blog you may want to take a look at called From the Walpole Woods  and she also has an Etsy shop where she sells sweet little baby shoes and handbags among other things. 
Thank you so much for entering the giveaway. I've sent an email asking for a mailing address and you will receive my Miss Bumble Pin cushion Kit and your choice of 2 patterns from B. Bumble & Co. (to be shipped).     Congratulations!


post signature


Sunday, July 3, 2011

Visit to a Quilt Shop and With a Fellow Blogger!


Yesterday, I was able to spend some time in Creations of Kerrville a fantastic quilt shop in Kerrville, Texas. This is a big shop, but it is well staffed with very helpful, friendly people. There are rooms and rooms of beautiful fabrics sorted by type - batiks, contemporary fabrics, Civil war reproductions, Depression era reproductions, etc. There was an entire room for books and another room for notions. I could have spent hours there, but my sweet husband was sitting in their classroom sipping coffee, reading, and acting so sweet I just couldn't leave him alone for too long. I bought "The Ghastlies", an Alexander Henry fabric, along with some coordinating fabrics. I am excited about getting home and starting on something special for Halloween!


Then.....


...I was able to visit with Lana from It seams to be sew.... today. My husband and I are taking a long weekend in our motor home up in the Texas hill country. Lana and her "sweet man Bill" are at their ranch in the Texas hill country where they are building a house (as you can see by the paint cans and tools and even the paint color testing on the side of the house.) In case you're wondering, Lana is the young pretty one and I'm the short, older one. I really thought my husband would just take a head shot! Oh, well, too late now. 
Lana and Bill have a beautiful setting for their "retirement" home. They have live oaks galore and lots of wildlife - deer and turkey especially, although a skunk visited yesterday! 
I wish I could meet all of you who are blogging friends face to face!
Sometimes I wonder if we might pass on the street and not even know it. Or sit on the same flight during a trip. Or know some of the same people. The older I get, the more I realize that this world is not as big as we once thought!

You have until midnight, July 6, to enter my giveaway here.

post signature