I have no idea where the word "koozie" came from, but you've all seen them and probably own some!
This tutorial is for one you make yourself. It's a cute little quickly sewn project that dresses up that bottled water or soda can and makes it cute enough for a picnic!
If you're suffering from the heat where you live, like a lot of the country, you know that the minute you take a cold bottle out in the hot air, you have condensation. This will soak up the extra water droplets for you and give it a little insulation.
Although I give you measurements for the one I made, you may want to measure your bottle or soda can to be sure it will fit. Just leave 1/2" extra length so you can sew 1/4" seams.
 | |
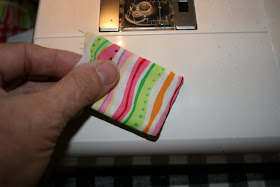
| 1. You will need an outer fabric, batting, and lining fabric. Cut pieces that are 4" x 9" and 2" x 3" out of each. This will be your "top" and "bottom" pieces. |
 |
| 2. Place lining and outer fabric right sides together with the batting on the bottom. Do this for both sets - both top and bottom. |
 |
| 3. For the bottom set, sew around three sides, leaving one shorter side open. |
 |
| 4. Turn this piece right side out. |
 |
| 6. Fold in half with outer fabric inside. Sew along the open edge using a 1/4" seam. |
 | |
| 7. Whip stitch the loose end of the bottom to the opposite side of the top. Turn right side out. |


Another wonderful little idea Linda. Such a useful thing too in the heat!
ReplyDeleteCheers
Well, isn't that the cutest? Thank you Linda ~
ReplyDelete:-}pokey
Thanks for the great idea and the wonderful tutorial. I hate sweaty bottles and cans and definitely need to make one for the water bottle.
ReplyDeleteLinda, I love this! I can see making them for my G-kids in different colors so they always know which water bottle/glass is theirs. Thanks for the tutorial.
ReplyDeleteneat, love the flower! thanks!
ReplyDeleteso cute Linda,well done
ReplyDeleteGreat idea - even for up north where the heat index today is 116F. Uff dah! Thanks for joining the blog hop at RocknQuilts today!
ReplyDeleteSO DARLING - I need this right now, lol!
ReplyDeleteWhat a cute little thing!! I love the fabric and the flower...your embellishments with flowers is catching on!!
ReplyDeleteis/are ??
ReplyDeleteLinda thanks so much for doing this. I've bookmarked it so I can come back to it when I get home. I'd love to make these for gifts. blessings, marlene
ReplyDeleteWhat a wonderful and cute idea! How do you come up with so many neat things???
ReplyDeleteI am with Stitchin - when I get home next week, I am going to make a couple too!!!
Whoop whoop!! What a great idea!!! And no more wet circles on my sewing table, either!!
ReplyDeleteSo cute. I see several tutorials I am going to come back to look at....thanks for joining up for Whoop Whoop Friday!
ReplyDeleteNow that sew clever! Know what you mean about condensation, what a mess. Very cute koozie. Try and stay cool, and use that koozie a lot!!
ReplyDeletenice add on to those boring water bottles:) Whoop,whoop from me!!
ReplyDeleteVery cute! I may have to make a few!
ReplyDeleteNice tutorial Linda, I so need to make a few of these!
ReplyDeleteOh! thank you so much for the "tute"! my mind...kinda took off when seeing the pics...what if there was a leeeetle pin cushion on the side...or maybe a pocket for scissors?
ReplyDeletehugZ,
annie
rubyslipperz106.blogspot.com